Long layers can curl beautifully, but they are also where flat, poker-straight tips show up most. The right curling wand technique is less about forcing every strand into a ringlet and more about controlling where the curl starts, how much end you leave out, and when the hair cools.
The short answer
For long layers, curl from the mid-lengths down, keep sections narrow enough for the full strand to touch the barrel, and wrap the final 1 cm of hair deliberately rather than leaving a long tail out. Hold the curl in your hand for a moment after releasing it, then let it cool before brushing. That cooling step is what stops the curled mid-length from relaxing while the ends stay oddly straight.
If your ends still look flat, the issue is usually one of four things: the section is too thick, the wand is being held at the wrong angle for the layer, too much of the tip is being left out, or the hair is being brushed before the shape has set.
Why long layers end up with flat tips
Long layered cuts behave differently from one-length hair because each section contains shorter and longer pieces. If you wrap the whole section as if it is one uniform length, the longest hairs often form the curl while the shorter layer slips, bends or sticks out. The result is a curl that looks bouncy in the middle but unfinished at the ends.
Flat ends can also come from the modern habit of leaving the last few centimetres out for a relaxed finish. That can look intentional on blunt, beachy waves, but it often reads as accidental on long layers, especially if the rest of the hair is polished. For a softer layered style, leave only a tiny tip out or include the end in the wrap for the final moment so it takes a slight bend.
Tool choice matters too. A very large barrel can make long hair look smooth and blown-out, but it may not give enough curve to the ends of shorter layers. A smaller barrel gives more shape, but can turn long layers too ringlet-like if the sections are tiny and all curled in the same direction. If you are deciding whether a wand is the right heated tool for your routine, this heated-tool routine comparison is a useful next read.
Set up the hair before you wrap
Start with fully dry hair. A curling wand should not be used on damp sections, as damp hair is more vulnerable to heat stress and the curl is less likely to hold evenly. Work through any knots first so the layer glides around the barrel instead of catching halfway down.
Use enough styling prep to support the curl, but do not overload the ends. Heavy oils, rich creams and too much serum can make long layers split into pieces and drop. A light heat protectant and a small amount of hold product through the mid-lengths usually gives a more flexible finish. Fine hair often needs grip more than softness, while coarse or dry hair may need smoothing before hold.
Sectioning is where the style is won or lost. Clip the top layer away, then curl from the underneath upwards. On long layers, horizontal sectioning can make the finish look neater because it stops the longest underlayer from mixing with shorter crown pieces. Around the face, take smaller vertical pieces so the curl sits with the haircut rather than against it.
The wrap method that avoids flat ends
1. Start lower than you think
Place the wand near the mid-lengths rather than right at the root. Long layers usually look more expensive when the root area stays slightly relaxed and the movement begins around cheekbone, jaw or collarbone level, depending on the cut. Starting too high can make layered hair mushroom out at the sides, especially on thick hair.
2. Keep the wand vertical or slightly diagonal
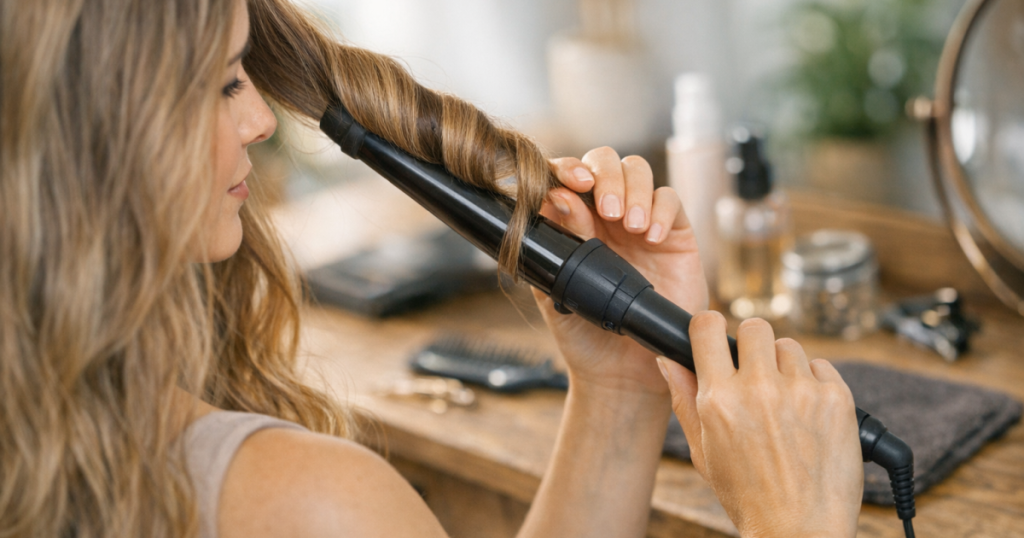
A vertical wand creates a softer drop through long layers. A diagonal wand adds lift and a more dressed finish. A horizontal wand can work for retro volume, but it is more likely to create a shelf-like bend where the layer begins. For everyday layered curls, hold the barrel with the tip pointing down and angle it slightly away from the face.
3. Wrap with even tension
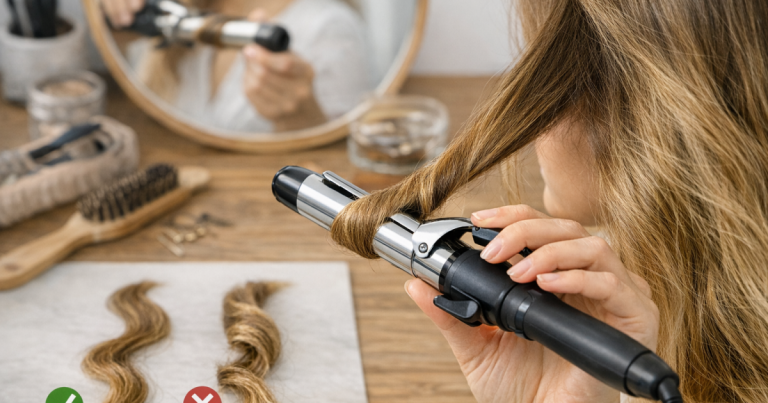
Take a section that is slim enough to heat evenly from root side to tip side. Wrap the hair flat against the barrel rather than twisting it into a rope. Twisted sections create a more piecey wave, but they can also leave the ends straighter because only part of the strand touches the heated surface.
4. Do not abandon the last centimetre
This is the key adjustment. Instead of leaving 3 cm to 5 cm of hair sticking out, guide the final 1 cm around the wand for the last part of the hold. A heat-resistant glove makes this easier because you can control the tip without moving your fingers too close to the barrel. The goal is not to make the end tight; it is to give it enough curve that it blends into the rest of the curl.
5. Catch the curl as it comes off the barrel
Slide the curl into your palm rather than pulling it down. Hold it lightly for a few seconds so the shape begins to set while it is still coiled. If you tug the curl straight as soon as it leaves the wand, the middle may relax but the very end can remain oddly stiff and straight.
6. Alternate direction, but not randomly
Curl the front pieces away from the face for an open, flattering shape. Through the back, alternate direction so the layers do not merge into one heavy wave. Keep the very top pieces a little looser if you want a soft salon-style finish rather than formal curls.
Adjust the curling wand technique by hair type
Fine hair needs lighter sections, less product weight and more cooling time. If fine long layers fall flat quickly, focus on root lift and grip before you start curling rather than adding more heat. A mousse or lightweight styling spray can help, but the hair should still feel touchable. For a heatless alternative when fine hair struggles to hold shape, the fine-hair prep guide covers how to build longer-lasting curl support without weighing the hair down.
Thick hair needs cleaner sectioning. If the section is too wide, the outside of the strand may curl while the inner hair stays smooth, which shows up as flat or uneven ends. Work in smaller rows and let each curl cool before dropping the next layer over it. Thick hair can also handle a slightly more deliberate end wrap, because the density disguises any tiny bend at the tip.
Wavy hair usually looks best when the wand enhances the natural pattern rather than fights it. Smooth the section first with your fingers or a brush, then wrap in the direction the wave already wants to move. If some layers are naturally straighter, curl those pieces in smaller sections so they do not sit as flat panels against the rest of the hair.
Curly hair that has been stretched or blow-dried before wand styling needs careful finishing at the ends. Ends that are dry, frizzy or uneven in porosity may resist a polished bend. In that case, use a little smoothing product before styling and avoid dragging a brush through the finished curls. If your hair behaves differently from root to tip, this porosity-focused tool guide helps explain why the same wand method can give different results on different sections.
Layer-by-layer placement for a softer shape
The underneath layer should be curled more simply than the top layer. It creates the foundation, so avoid overworking it. Wrap away from the face on both sides, then alternate through the back. The curls do not need to be perfect; they just need to support the shape above.
The middle layer is where most of the visible movement sits. Start the curl around the widest part of the haircut, often near the jaw or collarbone. If the layer begins high, start higher; if your layers are long and blended, begin lower. The aim is for the bend to sit where the haircut already has movement.
The top layer should be the most controlled. Take narrower pieces, keep the wand vertical, and avoid curling too close to the root unless you want a more glamorous finish. For face-framing pieces, wrap away from the face and include the ends just enough to stop them flicking straight. If your front pieces are shorter than the rest, reduce the section size rather than increasing the heat.
Common mistakes and quick fixes
- The ends are still straight: Leave less hair out and wrap the final 1 cm around the barrel at the end of the hold.
- The curl drops within minutes: Let each curl cool before brushing, and use less smoothing product before styling.
- The layers look too separated: Curl slightly larger sections on the top layer, then brush only once the hair is fully cool.
- The finish looks too ringlet-like: Use a wider section, hold the wand vertically, and gently shake the curls apart with your fingers instead of brushing hard.
- The face-framing pieces flick out: Start the wrap lower, keep the barrel angled away from the face, and curve the very end inwards for a moment before releasing.
- One side looks flatter: Most people wrap more confidently on one side. Slow down on the weaker side and mirror the wand angle rather than the hand movement.
How to brush out without losing the ends
Brushing is where many good curls become flat-ended waves. Wait until the hair feels completely cool, then start with your fingers. Separate the roots and mid-lengths first, leaving the ends alone until the shape has softened. If you use a brush, brush from the underneath and support the curl with your other hand.
For a polished finish, use a tiny amount of lightweight serum on the palms and press over the surface, not through the ends. For a softer, airy finish, skip serum and use a flexible hold spray from a distance. Avoid spraying the ends until they are crunchy; stiff ends are more obvious on long layers because they sit away from the rest of the curl.
Straight answers
Should long layers be curled towards or away from the face?
Curl the front sections away from the face for the most flattering, open shape. Through the back, alternate direction so the layers do not clump together. If your haircut has strong face-framing pieces, keep those sections smaller and more controlled.
How much hair should be left out at the end?
For long layers without flat ends, leave only a tiny tip out or wrap the last 1 cm briefly. Leaving several centimetres out creates a beachier look, but it can make layered hair appear unfinished if the mid-lengths are much curlier than the tips.
Can this method work on heatless curls?
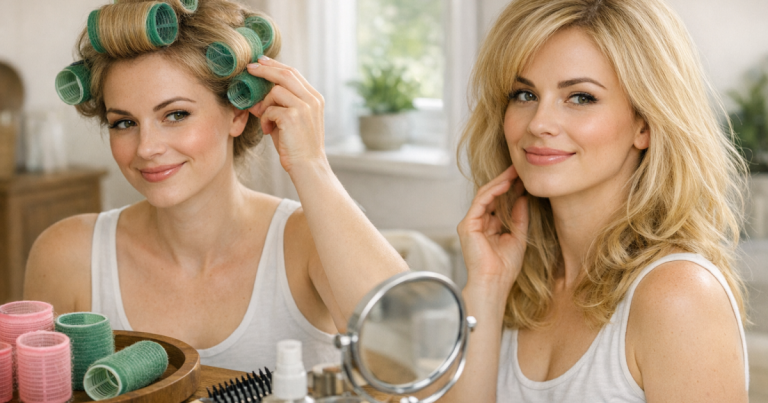
Yes, the principle is similar: the ends need to be guided into the shape rather than left loose. With heatless rods, wraps or rollers, smooth the final centimetre into the tool and secure it neatly so the end dries or sets with a curve.
Main points
Long layers need more deliberate end control than blunt cuts. Use narrow, smooth sections, hold the wand vertically or diagonally, start the curl where the layer naturally moves, and include the final centimetre of hair so the tip does not sit flat. Let the curl cool before brushing and adjust section size to your hair density, porosity and natural texture. The result should be layered movement that looks soft all the way through, not curled in the middle and forgotten at the ends.