Clamp marks usually come from closing the clip too hard, starting at the wrong point, or twisting hair before it is smooth. The aim with a curling iron clamp is to use the clip as a light guide, not a press, so the strand wraps evenly without a ridge. Small changes to angle, tension and release make a bigger difference than rushing out for a different tool.
Work on fully dry hair, keep the barrel away from skin, and use a heat-resistant surface while the tool is heating or cooling. If your hair feels fragile, snapping or heavily processed, reduce heat styling frequency and focus on conditioning and lower-tension methods.
The crease-free method in brief
- Use a section that is narrower than the barrel length so the hair can lie flat.
- Comb the section immediately before curling; tangles create folded lines under the clip.
- Keep the clip slightly open as you feed the hair through rather than snapping it shut.
- Start at the mid-lengths for most hair types, then glide towards the ends before rolling up.
- Match the clamp direction to the curl direction so the hair wraps smoothly around the barrel.
- Release by opening the clip fully and sliding the curl out; do not drag the clamp across the curl.
Why the clamp leaves a crease
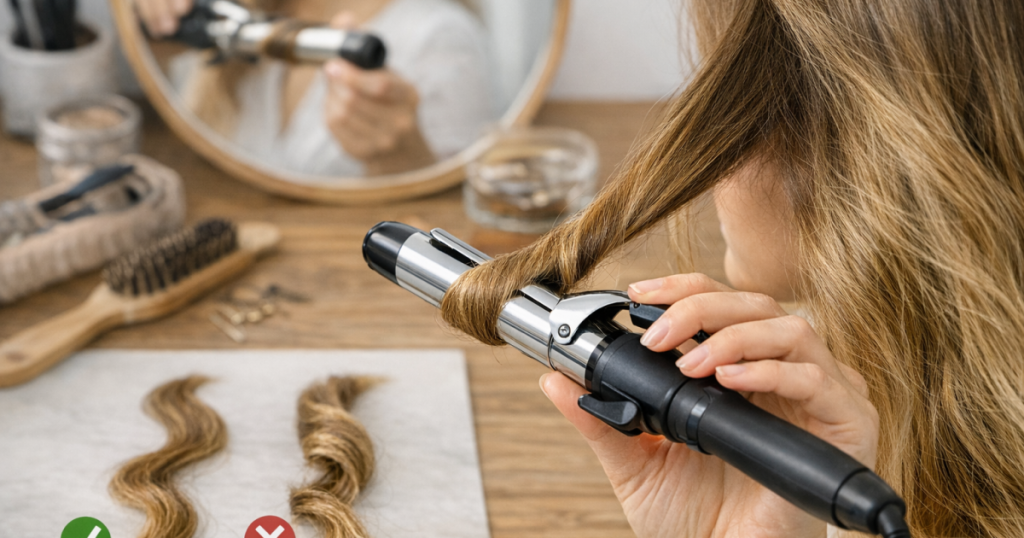
A clamp crease is a pressure mark. It appears when the clip presses a small fold of hair against the hot barrel for long enough to set that fold into the curl. This is more likely when the section is too thick, the hair is not lying flat, or the tool is rolled before the ends are properly aligned.
The mark can also come from tension imbalance. If one side of the section is pulled tighter than the other, the clamp catches the shorter or looser hairs and stamps a ridge into them. This is why clamp marks often show up near the ends, around face-framing layers, or in areas where hair changes texture.
Think of the clamp as part of the shaping process rather than a grip that has to hold all the weight of the section. For a clearer breakdown of how tools create different finishes, the guide to lift, shape, smoothness and hold is useful background when you are working out whether a crease is caused by technique, tension or the tool itself.
Step-by-step: use the clamp without stamping a line
1. Prep the section so it can sit flat
Begin with dry hair. A curling tong should not be used on damp hair, and moisture can make the section swell, catch and crease. Brush or comb through the section, then hold it out from the head with light, even tension. If you use heat protectant, let it dry down before curling so the hair does not feel tacky under the clip.
For fine hair, keep products light. Too much mousse, hairspray or oil before curling can make strands stick together and fold. For thick, coarse or dense hair, divide the area into smaller sections so the clamp is not forced to compress too much hair at once. If your tools often feel underpowered or awkward on dense hair, the guide to styling tools for thick and coarse hair explains why sectioning and tool choice matter so much.
2. Hold the tool at a clean angle
For a classic curl, hold the barrel vertically with the clamp facing forwards or slightly towards the direction the hair will wrap. For soft waves, angle the barrel diagonally rather than straight up and down. The key is to avoid clamping across the hair at a sharp sideways angle, because that creates a visible kink before you have even started rolling.
Keep the section smooth and flat, like a ribbon. If the hair twists into a rope before it reaches the barrel, the clamp will press that twist into place. This is especially important around the front pieces, where a small crease catches the light and looks more obvious.
3. Start at the mid-lengths, not right at the ends
For most people, the mid-length start is the easiest crease-prevention method. Open the clamp, place the middle of the section between the clip and the barrel, then close the clip lightly. Rotate the barrel once away from the face or towards the face, depending on the curl direction you want.
Next, open the clamp slightly and glide the tool down towards the ends, keeping the hair flat as it feeds through. Stop before the very tips disappear, then roll back up towards the root area. Used this way, the curling iron clamp guides the strand into a curl rather than pinning the ends in one hot crease.
4. Do not squeeze the clip shut
A spring clamp can feel as though it wants to snap closed, but you do not need maximum pressure for a secure curl. Hold the lever just enough to soften the clamp pressure while the hair wraps around the barrel. This gives the section room to move and reduces the chance of a hard line.
If the strand keeps slipping out, use a smaller section rather than clamping harder. Slipping usually means there is too much hair, too much product residue, or the section is not being held with enough even tension from your other hand.
5. Feed the ends in carefully
The ends are the most common place for clamp dents because they are shorter, drier and easier to fold. Before rolling the final part of the section, check that the ends are lying in the same direction as the rest of the hair. If they bend backwards under the clip, you will get a fishhook shape or a crease.
For blunt cuts, tuck the ends cleanly under the clamp and roll with light tension. For layered hair, leave the final 1–2 cm out for a more modern bend, or tap the ends with the barrel briefly after releasing the curl. Use metric judgement rather than perfection here: if your shortest layers cannot sit neatly under the clip, forcing them will usually make the mark worse.
6. Release the curl cleanly
Open the clamp fully before removing the tool. Do not half-open it and drag the barrel down through the curl, as this can scrape a new dent into the shape you have just made. Let the curl slide into your palm, hold it for a few seconds while it cools if you want extra hold, then drop it gently.
Resist brushing immediately. Hair sets as it cools, so brushing too soon can stretch the curl unevenly and reveal any small lines. Once all sections are cool, use your fingers, a wide-tooth comb or a soft brush depending on the finish you want.
Adjust the method for your hair type
Fine or easily marked hair
Fine hair shows clamp lines quickly because it takes shape with less pressure. Use smaller sections, lighter clamp tension and shorter contact time. Avoid clamping right at the ends unless the ends are very smooth and even. If your goal is volume rather than a defined curl, large rollers may give a softer result with less risk of dents; for a heatless route, see the tutorial on using Velcro rollers for volume on fine hair.
Thick, coarse or resistant hair
Dense hair often creases because the section is too bulky for the clamp to close evenly. Make sections narrower and shallower, then curl in layers rather than trying to wrap a large piece at once. Keep the section brushed smooth from root to tip and maintain firm, even tension with your holding hand. The clamp should not be doing all the gripping work.
Curly, wavy or frizz-prone hair
If the natural texture is uneven, the clamp can press raised areas into a ridge. Smooth the section first with a brush and use enough tension to align the hair, but do not stretch so hard that the curl springs back into a kink. For a polished finish, curl smaller sections and let each one cool before separating. For a softer finish, leave the ends slightly straighter and break the curls up with fingers rather than a brush.
Short layers, fringes and face-framing pieces
Short pieces need a lighter touch because there is less length to wrap around the barrel. Start lower down the section, use a diagonal angle, and keep the clamp open enough that the hair can move. Around the face, curl away from the face for a lifted look, but avoid clamping too close to the root unless you specifically want strong shape there.
Two clamp techniques worth practising
The glide-and-roll technique
This is the most forgiving option for everyday curls. Clamp at the mid-lengths, rotate once, loosen the clamp slightly, glide towards the ends, then roll back up. It works well for shoulder-length and longer hair because it smooths the strand before setting the curl.
The open-clamp wrap
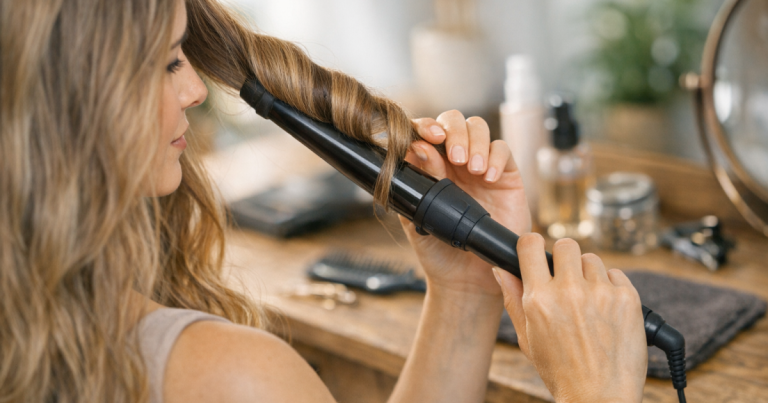
This method treats the tong more like a wand. Open the clamp, wrap the hair around the barrel with your fingers, then use the clip only to secure the last part of the section lightly. It can help when the clamp keeps leaving marks, but it needs careful hand placement because the barrel is exposed. A heat-resistant glove can add a margin of comfort, though it should not make you careless around the hot surface.
Common mistakes that cause clamp marks
- Clamping a twisted section: brush the section flat first and keep it ribbon-like as it wraps.
- Using too much hair: if the clamp cannot close smoothly, the section is too large.
- Starting at the very ends: this can fold fragile tips into a crease before the curl forms.
- Snapping the clamp shut: soften the pressure with the lever and guide the hair through.
- Dragging the tool out: open the clamp fully and let the curl slide off the barrel.
- Overloading with product: sticky or stiff hair catches under the clamp and sets with ridges.
How to fix a crease without redoing the whole curl
If the crease is small, wait until the curl cools, then stretch the marked area gently between your fingers and tap it with the side of the warm barrel for a second or two. Do not clamp over the same dent again, because that usually makes the line sharper.
For a mark near the ends, smooth the tips with a tiny amount of lightweight serum or oil, then bend them around the barrel without closing the clamp. For a mark near the mid-lengths, re-curl only that small area using the open-clamp wrap technique. Let it cool before brushing so the correction has time to set.
Questions people ask
Should the clamp face forwards or backwards?
It depends on curl direction, but the clamp should sit in the direction that lets hair feed smoothly around the barrel. If the section twists or buckles as you roll, turn the tool and try the opposite orientation.
Is it better to curl from the roots or the ends?
For avoiding creases, starting at the mid-lengths is usually easiest. Starting at the ends can work on very smooth, even hair, but it is less forgiving on layers, dry tips and fine hair.
Why do I only get creases on one side?
One side is often harder because your wrist angle changes. Curl that side more slowly, check the clamp direction in the mirror, and keep the section flat before closing the clip.
Can hairspray stop clamp marks?
Hairspray can help hold the finished curl, but it will not fix poor clamp placement. Too much spray before curling can actually make hair stick, fold and crease more easily.
Do I need a wand instead?
Not necessarily. A wand avoids clamp marks because there is no clip, but a tong can still give smooth curls if you use lighter pressure, smaller sections and a cleaner release.
Main lessons
A crease-free curl is mostly about control: smooth section, light clamp pressure, clean angle, careful ends and a full release. Practise slowly on the front pieces first, because they show every mark and teach you the most about your wrist position. Once the movement feels natural, the clamp becomes useful rather than frustrating, giving you polished curls without the tell-tale ridge.