If your heatless curls drop before lunch, the issue is usually not the rod, robe tie or rollers on their own. It is more often a mismatch between how damp the hair was, how much support you added, the size of the sections and how you broke the curls apart afterwards.
The aim is not to make your hair stiff. It is to give the curl enough structure to survive movement, humidity, brushing, coat collars and the natural weight of your hair through the morning.
The quick rescue plan
For longer-lasting heatless curls, start with hair that is slightly damp rather than wet, add a lightweight hold product before wrapping, use smaller sections around the face and crown, and do not release the style until the hair is fully dry. Once released, separate with fingers, not a brush, and finish with a light mist of flexible hairspray or texture spray if your hair tolerates it.
If your curls have already softened by midday, do not soak the hair and start again. Mist the limp sections very lightly, re-wrap the front pieces or ends for 10–20 minutes if you can, then scrunch in a tiny amount of styling cream, mousse or spray depending on your hair type.
Why heatless curls fall out so quickly
Heatless styling relies on three things: moisture, shape and time. Damp hair is more flexible, the tool creates the curve, and drying time helps the hair settle into that new pattern. If one part is off, the curl can look promising when you unwrap it, then slowly stretch out as the morning goes on.
The most common causes are simple but easy to miss:
- The hair was too wet. It looked smooth when wrapped, but the inner layers were still damp when released, so the curl never properly set.
- The hair was too dry. Very dry hair, especially coarse or resistant hair, may not take enough shape from a heatless tool alone.
- The sections were too large. Big sections give a soft bend, not a lasting curl, and they are more likely to collapse under their own weight.
- The product was too heavy. Rich creams, oils and leave-ins can pull fine or medium hair down before lunchtime.
- The release was too rough. Brushing through immediately can turn defined curls into loose waves within minutes.
Step 1: get the starting dampness right
The sweet spot is usually around 80–90% dry for fine and medium hair, and slightly damper for thick, coarse or very straight hair. The hair should feel cool and pliable, not wet enough to soak the tool or leave marks on your pillow.
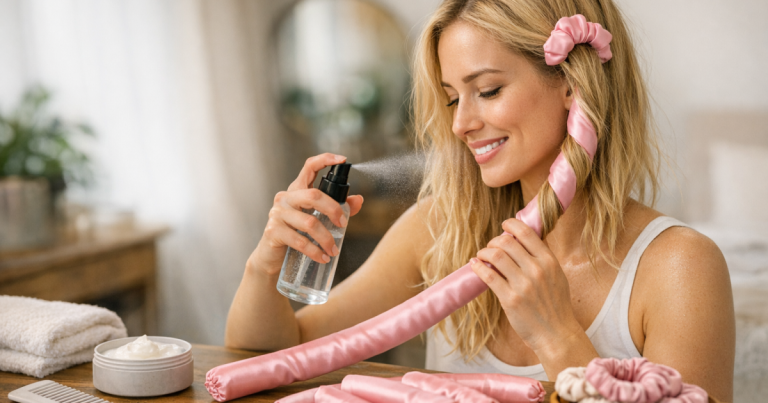
For fine hair, use a spray bottle rather than styling straight from freshly washed hair. Mist the mid-lengths and ends, then wait a minute before wrapping so the water distributes evenly. If fine hair tends to go flat at the roots, follow a lighter routine like this guide to prep fine hair for long-lasting heatless curls rather than layering on heavy curl creams.
For thick or high-density hair, surface dampness can be misleading. The top layer may feel ready while the underneath is still too wet or too dry. Work in horizontal layers and check the nape area before wrapping, as this section often holds moisture longest.
Step 2: use hold before you wrap, not just after
Finishing spray alone cannot rescue a curl that was never supported during setting. A small amount of product before wrapping gives the hair memory, so the shape has something to cling to once the tool comes out.
For fine hair
Use a lightweight mousse, root-friendly volumising spray or a small amount of flexible setting lotion through the lengths. Keep oils, rich masks and heavy creams away from the mid-lengths before styling. They can make the hair shiny, but they often reduce grip.
For medium or layered hair
A light mousse or curl-enhancing spray usually gives enough support without crunch. If your ends are layered or freshly trimmed, apply a little extra product to the final few centimetres so they do not flick straight while the rest of the hair waves.
For thick, coarse or frizz-prone hair
Use a smoothing leave-in sparingly, then add a hold product on top. Too much cream can stretch the curl, but no cream at all can leave the surface fluffy. The balance is softness first, hold second.
Step 3: make the sections smaller where curls usually drop
Large sections are tempting because they are quicker, but they create looser movement. If your curls look good at 8am and barely there by noon, reduce the section size rather than tightening the whole wrap aggressively.
Focus on the areas that collapse first:
- Front layers: wrap smaller pieces away from the face so they have more shape and do not blend into one flat curtain.
- Crown layers: lift the section slightly as you wrap to avoid a flat root and bouncy ends only.
- Long ends: tuck the ends neatly and keep tension even so they do not dry straight.
- Underlayers: use consistent section sizes, otherwise the top may curl while the underneath stays limp.
Do not pull so tightly that the hairline feels strained or the curl forms a harsh ridge. Smooth, even tension is better than force.
Step 4: let the hair dry completely before release
This is the step most people underestimate. If hair feels even slightly cool, clammy or heavy when you unwrap it, it probably needs more time. Releasing too early gives a beautiful first look, followed by rapid stretching as the remaining moisture evaporates.
If you wash your hair in the evening, rough-dry or air-dry until it is mostly dry before wrapping. Fine hair that becomes flat while drying may need a root-focused approach first; this tutorial on how to air-dry fine hair without it looking flat is useful if your roots collapse before the curls even start.
For overnight styling, choose a wrap method you can sleep in without crushing one side. If you toss and turn, a silk hair wrap or smooth pillowcase can reduce friction, but it will not compensate for hair that was too wet at the start.
Step 5: release without brushing the curl away
How you take heatless curls out matters as much as how you put them in. Unwrap gently in the direction of the curl rather than pulling the tool straight down. Let the curls sit for a few minutes before separating them; this short pause helps them settle.
Then use your fingers to split each curl into smaller ribbons. Start at the ends and work upwards. If you need more volume, shake at the roots rather than raking through the lengths. A brush can be useful later in the day for soft waves, but straight after release it often removes too much definition.
Finish according to your hair’s behaviour. Fine hair usually needs a light mist of flexible hairspray or texture spray. Thick or porous hair may prefer a tiny amount of cream smoothed over the surface, followed by a small amount of spray only where the curl drops fastest.
Hair-type fixes when the same routine keeps failing
Fine hair that goes limp
Use less moisture, smaller sections and lighter product. Avoid applying oil before wrapping unless your ends are very dry, and keep conditioner away from the roots on styling days. Fine hair often holds better when washed the day before rather than freshly conditioned on the same morning.
Long, heavy hair that stretches out
The weight of long hair naturally pulls curls down. Wrap narrower sections, add more shape around the mid-lengths and avoid creating curls only at the ends. A satin heatless curling rod can create a softer, elongated bend, while velcro rollers at the crown can help add lift if the roots flatten.
High-porosity hair that frizzes before it drops
High-porosity hair often needs moisture control before hold. Use a light leave-in to smooth the surface, then layer a mousse or setting spray. If the hair swells in damp weather, avoid over-misting during the morning refresh because extra water can restart the frizz cycle.
Low-porosity hair that resists shape
Low-porosity hair can repel water and product, so dampness may sit on the surface rather than helping the hair reshape. Use very light layers of product, give the hair longer to set, and avoid heavy creams that coat the strand. For a deeper explanation, read the guide to high and low porosity hair and how it affects styling tool choices.
A lunchtime refresh that does not ruin the style
When curls have softened but are not completely gone, aim for targeted repair. Do not wet the whole head or brush everything out unless you want a looser wave.
- Mist only the dropped pieces from a distance so they are barely damp.
- Twist each piece around your finger in the original curl direction.
- Clip or hold the twist for a few minutes while it dries.
- Scrunch once dry, then add a light hold spray if needed.
- For flat roots, lift the crown with your fingers and use a tiny amount of dry texture spray rather than adding more cream.
If the curl has completely disappeared, re-wrapping a few visible face-framing sections is usually more effective than trying to revive every layer. The goal is to restore shape where people notice it most.
Questions people ask
Why do my heatless curls drop even when I sleep in them?
Your hair may still be too damp when you unwrap it, or the sections may be too large for your hair length and density. Sleeping in the tool helps only if the hair fully dries in the curled position.
Should I use mousse or hairspray for heatless curls?
Use mousse before wrapping if your hair needs structure, then a light hairspray after release if it needs extra hold. Fine hair often does better with a small amount of both than a lot of one product.
Can too much conditioner make heatless curls fall out?
Yes. Rich conditioner, masks or oils can make hair too slippery, especially if it is fine or freshly washed. Keep heavier conditioning treatments for non-styling days if hold is your priority.
Is it better to do heatless curls on clean or second-day hair?
Second-day hair often holds better because it has more natural grip. If your scalp gets oily quickly, keep roots fresh with dry shampoo and add styling product mainly through the lengths.
How do I stop the ends from staying straight?
Make sure the ends are lightly damp, coated with a little hold product and tucked smoothly around the tool. If the final few centimetres are left loose, they will usually dry straighter than the rest.
Key takeaways
Longer-lasting heatless curls come from controlled dampness, light pre-styling hold, smaller sections and a gentle release. Fine hair usually needs less moisture and less product; thick or resistant hair needs more drying time and more deliberate sectioning. If your curls collapse by lunchtime, change one variable at a time so you can see what actually improves the hold.