A three-barrel waver can give soft, uniform bends quickly, but the ends are usually where the style starts to look puffy, dry or overworked. The fix is less about clamping harder and more about preparation, section control, heat discipline and leaving the final centimetres alone.
The aim is smooth, relaxed waves with movement through the lengths and a polished finish at the bottom. Think of the waver as a shaping tool, not a straightener, and your ends will behave much better.
The short version
- Start with fully dry, detangled hair; damp patches are a fast route to frizz and uneven bends.
- Use light heat protection, then avoid layering on heavy oils before waving.
- Clamp the mid-lengths first and keep the last 2–3 cm softer rather than pressing them flat.
- Use smaller sections for thick hair and wider, looser sections for fine hair that dents easily.
- Let each wave cool before brushing, shaking out or adding finishing product.
Why the ends go frizzy with a waver
Frizzy ends usually happen for one of five reasons: the hair was not smooth before styling, the section was too thick, the clamp was held too long near fragile ends, the hair was brushed out while warm, or the finish product was too heavy. A waver creates repeated bends, so any roughness at the bottom is exaggerated.
Ends are also older and more exposed than the roots. Colouring, previous heat styling, friction from scarves and winter coats, and rough towel-drying can all make the bottom few centimetres more porous. When you press that hair between hot barrels, it can flare out instead of forming a clean S-shape.
Compared with heatless waves, a hot waver gives faster structure and more immediate polish, but it is less forgiving on dry ends. If your hair is already brittle, alternate heat days with gentler styling methods rather than relying on the waver every wash day.
Step 1: Prep the hair so the tool is not fighting tangles
Start with hair that is completely dry. If you blow-dry first, use the nozzle to smooth the cuticle downwards rather than rough-drying the ends in every direction. If you air-dry, wait until the underneath layers and nape are dry too; hidden dampness can make the finish swell and frizz.
Detangling matters more than many people expect. Work from the ends upwards with a gentle brush or wide-tooth comb, then smooth each section once more before clamping. If your hair tends to puff up during prep, the technique in detangling without adding frizz is useful even when you are about to use a heated tool.
Use heat protectant before styling, but keep it light. A mist such as ghd Bodyguard Heat Protect Spray can suit many routines, provided you apply it evenly and allow it to dry before the waver touches the hair. Wet product plus hot plates or barrels can leave the ends feeling rougher, not smoother.
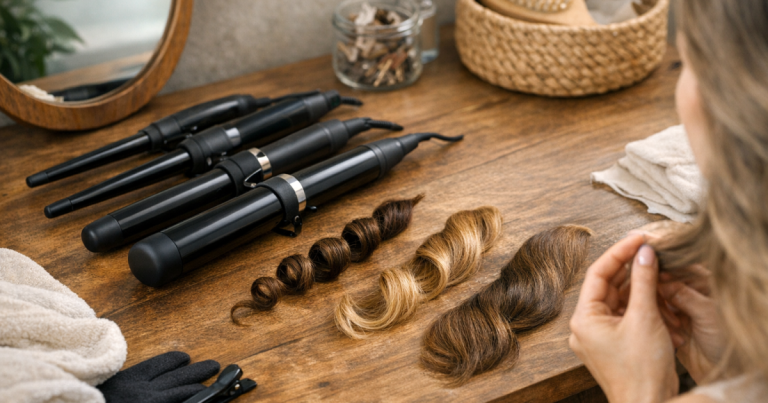
Step 2: Section by density, not by habit
When using a three-barrel waver, section size is one of the biggest differences between soft waves and fuzzy ends. If the section is too thick, the outer hair gets more heat than the inner hair, so you keep clamping longer and the ends become overworked.
Fine or low-density hair
Take slightly wider but shallow sections. Fine hair often dents quickly, so you do not need to squeeze the clamp aggressively. A lighter hold and shorter contact time can give a softer result without creating a crimped edge at the bottom.
Thick or coarse hair
Use narrower sections and work in layers from the nape upwards. Thick hair often looks frizzy at the ends when only the surface has been shaped. Smaller sections let the wave form more evenly, so you are less tempted to go back over the same ends repeatedly.
Curly, wavy or textured hair
Decide whether you want to preserve some natural texture or create a more uniform wave. For a smoother finish, stretch or smooth the hair first with your usual low-frizz drying method. Avoid dragging the waver down the strand; open and reposition it instead.
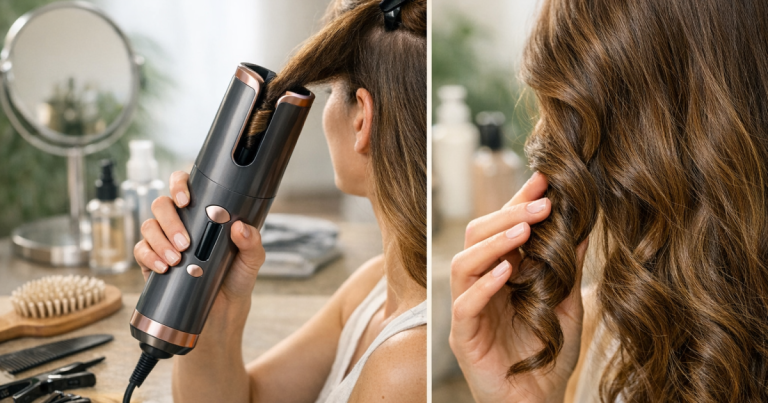
Step 3: Clamp the mid-lengths first
Place the first clamp around the mid-lengths, not right at the root and not near the ends. Hold the tool still, release, then move down so the next bend overlaps slightly with the previous one. This overlap helps the pattern look intentional rather than like separate dents.
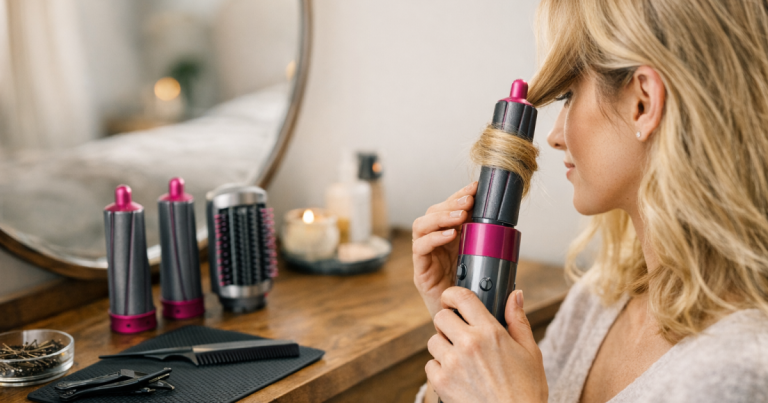
A model such as the Mermade Hair Pro Waver 32mm is a recognisable example of the style of tool many people mean by a barrel waver, but the same technique applies across similar clamp-style wavers. Always check the instructions for your own tool, especially heat settings and recommended use on dry hair.
Keep your wrist relaxed and the tool parallel to the floor for classic beachy waves. If one side looks more kicked-out, check whether you are tilting the tool as you move down. Small angle changes show up most at the ends.
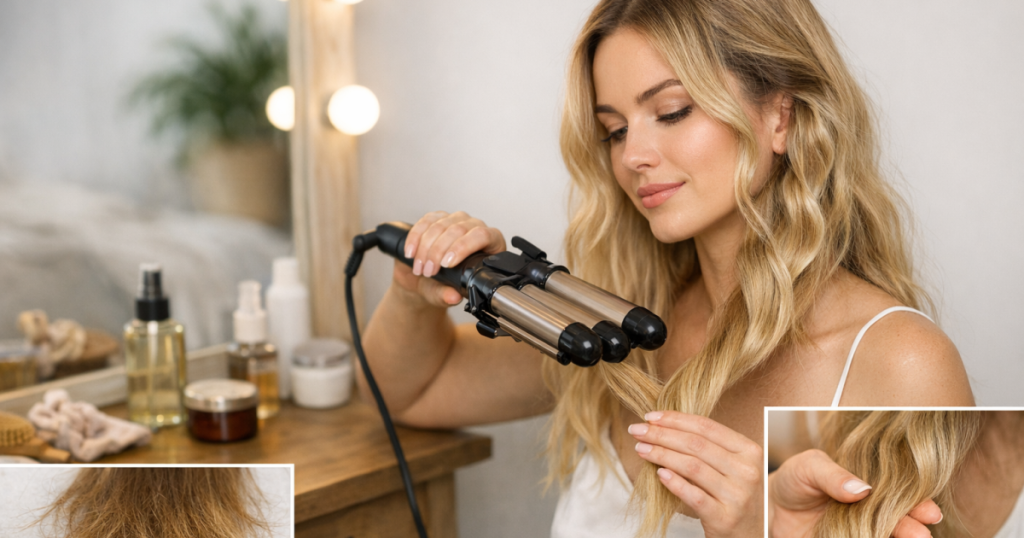
Step 4: Treat the last few centimetres differently
For the neatest finish, avoid fully clamping the last 2–3 cm unless your ends are very blunt and healthy. Leaving a softer tail makes the wave look modern and stops the bottom from ballooning out. If your ends are layered, feathered or dry, this step is even more important.
You have three good options:
- Leave the ends out: stop the final clamp just above the ends and let the bottom sit naturally.
- Tap, do not press: briefly close the tool near the ends without holding it for as long as the mid-lengths.
- Smooth afterwards: once cool, add a tiny amount of lightweight serum or cream to your palms and skim only the surface.
Avoid adding oil before using the waver if your ends are already prone to frizz. Oil can make the hair look shiny at first, but too much slip before heat can leave fine hair separated and can make dry ends appear stringy. If you use an argan oil hair treatment, keep it for the finishing stage and use less than you think you need.
Step 5: Let the wave cool before touching it
Freshly waved hair is still setting while it cools. Brushing it straight away can break up the pattern and roughen the ends, especially on porous or colour-treated hair. Clip each section loosely out of the way if needed, or simply let it fall while you finish the rest of your head.
Once everything is cool, use your fingers first. Shake from underneath rather than raking from the top down. If you want a softer result, use a wide-tooth comb only through the mid-lengths and avoid combing the last few centimetres too much.
If heat styling leaves your hair feeling rough after a few uses, a leave-in spray or bond-supporting treatment may be worth considering. For one example of a prep product aimed at heat-styled hair, see the Living Proof Restore Perfecting Spray review.
Finishing moves that keep the ends smooth
Finishing product should support the wave without coating the ends heavily. For fine hair, try a flexible hairspray misted from a distance, then smooth flyaways with clean hands. For thick hair, use a small amount of cream or serum warmed between your palms before lightly pressing the ends together.
If your roots fall flat but your ends frizz, do not add more product to the bottom. Lift the roots with your fingers and mist there instead. The more product you add to dry ends, the more likely they are to clump, separate or look dull by the afternoon.
For humid UK weather, the goal is controlled flexibility rather than a stiff shell. A hard, crunchy finish can crack when you put on a coat, scarf or hood, making the ends look rough again. A soft hold usually lasts better in real life.
Hair-type adjustments that make the biggest difference
Fine hair that drops quickly
Use less product before styling and let each section cool fully. Fine hair can look frizzy when it is actually overloaded. Keep the ends barely touched by the tool, then add hold at the root and mid-lengths rather than coating the bottom.
Thick hair that needs more definition
Work in smaller sections and wave the underneath layers properly. If only the top layer is shaped, the unstyled bulk underneath can push the ends outwards. For thick hair, neat sectioning usually matters more than using the highest heat setting.
Bleached, highlighted or dry ends
Protect and minimise. Wave the healthiest mid-lengths, leave more of the ends out, and finish with a tiny amount of smoothing product. If the ends still look fuzzy after careful styling, they may need a trim rather than more heat.
Short layers or face-framing pieces
Use the waver sparingly around the face. Short pieces can bend too sharply and flick out. Clamp lower down, reduce contact time and use your fingers to place the front sections while they cool.
Common mistakes to avoid
- Clamping wet or product-damp hair: it can leave the surface rough and the pattern uneven.
- Starting too close to the ends: this concentrates heat on the most fragile part of the hair.
- Using sections that are too deep: the outer layer overheats before the inner layer forms a wave.
- Brushing immediately: warm waves are easy to disturb, which makes the ends expand.
- Repeating passes on problem areas: smooth, cool and finish instead of pressing the same ends again and again.
Common questions
Should I straighten my ends after using a waver?
Only if you need a very polished finish, and keep it minimal. For most hair types, leaving the last 2–3 cm out or smoothing with fingers looks softer and causes less heat stress than adding another hot tool pass.
Why do my waves look crimped rather than beachy?
The sections may be too narrow, the clamp may be held too long, or the tool angle may be too rigid. Use slightly larger surface sections, reduce pressure and shake the waves out only after they cool.
Can I use a waver on naturally curly hair?
Yes, but the result depends on prep. For a uniform wave, smooth or stretch the hair first. For a more natural finish, use the waver only on pieces that need extra definition and leave some texture untouched.
How do I sleep on waved hair without ruining the ends?
Let the hair cool completely, avoid heavy product, then loosely gather it away from friction. The same principles used for sleeping in heatless curls without flattening them can help preserve waved ends too.
The big picture
Smoother waved ends come from restraint: clean prep, sensible sectioning, controlled clamping and a light finish. The three-barrel waver is excellent for quick, even texture, but it works best when you let the mid-lengths do most of the styling and treat the ends as the delicate finishing detail.
If the bottom of your hair still looks frizzy despite careful technique, reduce heat frequency for a while and rotate in heatless styling days. Your waves will look better when the ends are healthy enough to hold shape without being forced into it.