Snags usually happen when the tool is overloaded, the hair is slightly tangled, or the curl is pulled out before the motor has finished. An automatic hair curler can be brilliant for even, repeatable curls, but it is less forgiving than a wand because the section has to feed cleanly into the chamber. The aim is simple: smaller, smoother sections, light tension and a release that lets the curl drop rather than drag.
The quickest way to avoid snags
For the neatest result, start with fully dry, brushed-through hair, work in slim sections, hold the tool upright, and keep the ends smooth as the hair feeds in. If the curler stops, beeps unexpectedly or feels as though it is pulling, release the hair immediately rather than trying to force the curl through.
- Use sections around 2 cm wide for fine or medium hair, and smaller sections for dense hair.
- Keep each section flat and untwisted before feeding it into the chamber.
- Do not apply heavy oil, sticky hairspray or wet styling cream before curling.
- Let the curl drop out; do not tug it straight away.
- Clean out loose hairs from the chamber regularly, following the tool’s care instructions.
Step 1: prep the hair so it feeds cleanly
Automatic curlers work best on hair that is dry, detangled and lightly prepped. Damp patches can make hair swell, grip and steam, while product build-up can make the section tacky instead of smooth. If you have washed your hair, make sure it is completely dry from roots to ends before using heat.
Brush gently from the ends upwards, then smooth each styling section again with your fingers before placing it into the tool. A detangling brush is useful here, particularly if your hair is fine, highlighted or prone to little knots at the nape. If your hair is fragile from regular heat styling or colour, a lightweight conditioning spray can help with slip, but avoid anything that leaves the hair wet or gummy. For prep ideas on heat-styled hair, see our Living Proof Restore Perfecting Spray review.
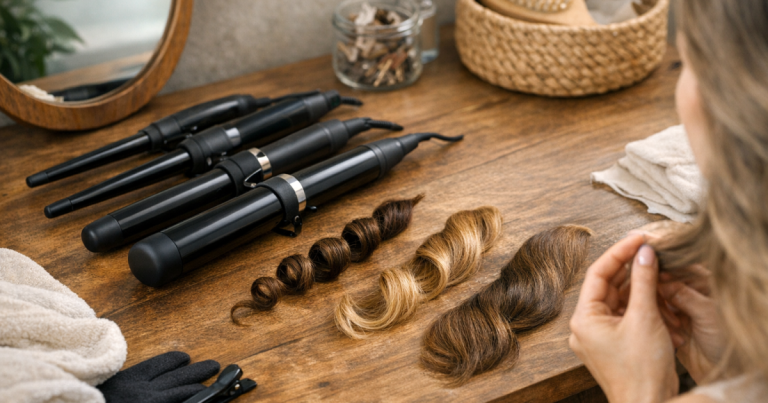
Step 2: choose the right section size for your hair type
The most common snag mistake is using a section that looks normal for a wand but is too thick for a rotating chamber. With an automatic hair curler, the hair needs space to wrap evenly. If the section bunches, folds or overlaps, the tool has to pull harder and the curl is more likely to catch.
Fine or low-density hair
Use narrow sections but avoid making them so thin that the ends fly around. Fine hair often snags because the tips are wispy and uneven, not because the section is too large. Smooth the ends together before feeding them in, and keep tension gentle.
Thick or coarse hair
Work in smaller sections than you think you need. Dense hair can look manageable from the outside while the inner layers are still bulky. If you hear the motor strain or the curl comes out creased, reduce the section size before changing anything else.
Curly, wavy or textured hair
Stretch and smooth the section first with your fingers or a brush, depending on your curl pattern and how much definition you want to keep. Do not drag through knots when the hair is already near the chamber. If your curls are delicate, use the tool to refine selected pieces rather than curling the whole head automatically.
Step 3: position the tool before you press the button
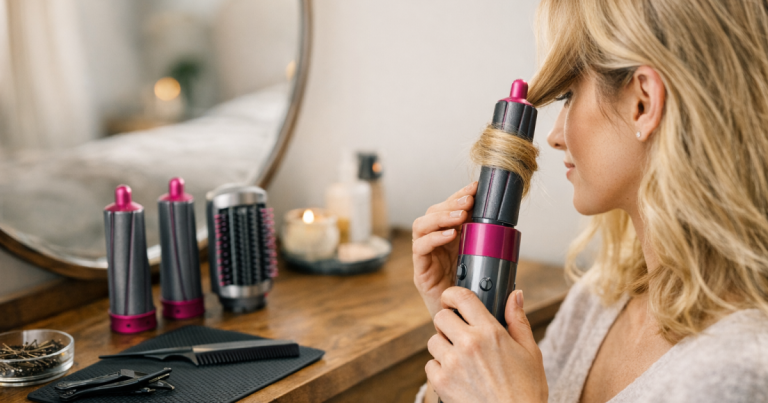
Hold the curler so the opening faces the section clearly and the hair can enter without bending back on itself. Many snags start before the motor rotates: the strand is twisted, the tool is angled awkwardly, or the roots are pulled too tight.
For most shoulder-length and longer styles, keep the tool fairly vertical and place the mid-lengths into the chamber first, allowing the ends to follow smoothly. Keep your free hand away from the opening once the tool starts rotating. If the curler is designed to be used in a specific orientation, follow the brand’s markings rather than guessing.
A rotating tool such as BaByliss Curl Secret can create consistent curls, but the exact technique still depends on your hair length, density and the model’s instructions. Always check the manufacturer’s guidance on section size, heat settings and cleaning before your first use.
Step 4: feed the hair in smoothly, not tightly
Light tension is enough. Pulling the section taut can make the hair enter the chamber under pressure, which increases the chance of a trapped end or sharp kink. Instead, hold the section neatly, place it where the tool asks you to, and let the mechanism do the wrapping.
If your hair has layers, the shorter pieces may spring out while the longer pieces rotate. In that case, curl layered areas in even smaller sections and smooth the shortest ends into the strand first. Around the face, angle the section slightly downwards so baby hairs and shorter layers are less likely to flick into the opening.
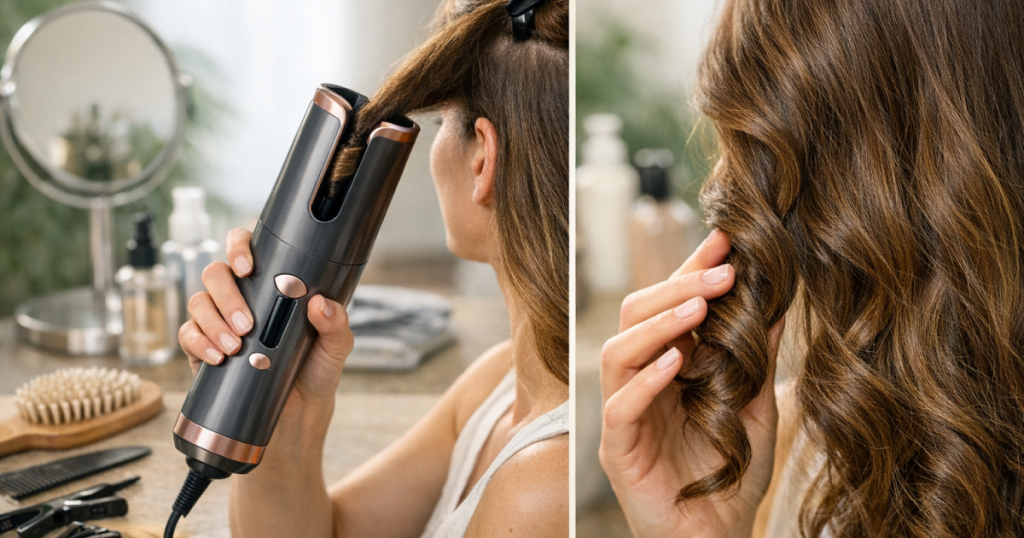
Step 5: release the curl without dragging
When the curl is ready, open the clamp or release mechanism fully and move the tool away from the head before touching the curl. The curl should drop out with minimal resistance. If you pull down while the hair is still partly wrapped, you can rough up the cuticle, stretch the curl and create a snaggy finish.
Let each curl cool in your palm for a few seconds if you want more hold, then leave it alone while you finish the rest of your hair. Brushing too soon can make the shape collapse, especially on fine hair. Once all sections are cool, loosen with fingers or a wide-tooth comb depending on your finish.
Common snag problems and quick fixes
- The tool stops mid-curl: release the section, check for a knot, and restart with less hair. Do not press repeatedly while the same section is trapped.
- The ends come out bent: smooth the tips before curling and reduce the section width. Dry, uneven ends catch more easily.
- The curl looks frizzy: check that the hair is fully dry and avoid sticky styling products before heat. Finish with a tiny amount of smoothing product only after curling.
- The roots feel pulled: start slightly lower down the strand and keep the tool upright. You can refine the root area separately with rollers if you want lift.
- The result is too tight: use larger sections only if the tool allows it, or brush out once cool. For broader heat-tool curl planning, our guide to curling wand barrel sizes explains how curl size changes the finished look.
What to adjust for different finishes
For polished curls, keep every section the same size and curl in a consistent direction. For a softer, more modern finish, alternate directions through the mid-lengths and keep the front pieces turning away from the face. Avoid overloading the tool just to get looser waves; a trapped section is more frustrating than a curl that needs brushing out.
If you are using a model such as Philips StyleCare Prestige Auto Curler, verify the direction controls and timing options in the manual rather than assuming they work like another brand. Different automatic curlers can feed, rotate and release hair differently, even when the finished curl looks similar.
Aftercare: make the curls last without re-curling
Once the curls have cooled, avoid touching them constantly. Fine hair may need only a light mist of flexible hold spray, while thick or coarse hair may benefit from a small amount of smoothing oil on the ends. Apply finishing products after curling, not before, unless the product is specifically intended for heat styling.
At night, protect the shape with a loose silk or satin wrap, a soft scrunchie, or a pineapple if your hair is long enough. The goal is to avoid crushing the curl pattern while keeping friction low. If you want to preserve the style for another day, our advice on sleeping in curls without flattening them also applies well to heat-created curls.
FAQ
Why does my automatic curler keep grabbing my hair?
Usually the section is too large, tangled, twisted or coated in sticky product. Release the hair, brush the section smooth, and try again with less hair.
Can I use one on freshly washed hair?
Yes, but only once the hair is completely dry. Freshly washed hair can be slippery, so use smaller sections and let each curl cool before brushing.
Is it better for short hair or long hair?
It depends on the curler’s chamber design and your shortest layers. Very short pieces can be harder to feed cleanly, while very long or dense hair needs smaller sections.
Should I curl towards or away from my face?
Away from the face is usually more flattering around the front. Through the back and sides, alternating directions can make curls look softer and less uniform.
What should I do if my hair gets stuck?
Stop pressing the curl button, open the release fully, and gently unwind the section in the opposite direction if needed. Do not yank; remove the strand slowly and brush it before trying again.
What to remember
Snag-free automatic curling is mostly about preparation and restraint: dry hair, smooth sections, modest section size and a calm release. If the tool feels as though it is fighting the hair, stop and reset rather than pushing through. With the right sectioning and a lighter hand, an automatic hair curler can give reliable curls without the trapped ends, tugging or random kinks that make heat styling feel like hard work.