
Freshly washed hair is not the only route to a soft, face-framing bend. The trick when you style a curtain fringe is to direct the roots first, then shape the ends so the pieces open away from the face rather than dropping straight down. A round brush gives more polish than fingers alone, but it needs the right brush size, airflow and cooling time to avoid a bouncy fringe that collapses by lunch.
The method below works for most curtain fringes, from cheekbone-skimming pieces to longer grown-out layers. Adjust the brush size, drying tension and product amount depending on whether your hair is fine, thick, wavy, curly, oily at the roots or prone to cowlicks.
What to know first
- Root direction matters more than the final flick. If the roots sit flat, split too harshly or lean the wrong way, the ends will not frame the face properly.
- Use a medium round brush for most fringes. A brush that is too small can make the fringe curl under; one that is too large may not create enough bend on shorter pieces.
- Dry the fringe before the rest of your hair. Short front layers set quickly as they air-dry, so deal with them while they are still damp.
- Cool the shape before touching it. Warm hair is still movable. Letting it cool around the brush or in clips helps the shape last.
- Less product is usually better. Heavy creams and oils can make a fringe separate or look greasy faster, especially on fine hair.
Set up the section properly
Start by separating the fringe from the rest of your hair. For most curtain fringes, this will be a soft triangle or curved section at the front, with the shortest pieces around the centre and longer pieces blending towards the temples. Clip the rest of your hair back so it does not get pulled into the brush.
The fringe should be damp rather than dripping wet. If it is freshly washed, blot it first with a towel or microfibre towel. If it is second-day hair, mist it lightly with water at the roots and mid-lengths. Rewetting the root area is often more effective than trying to reshape dry hair with heat alone.
Apply heat protection sparingly. For a fringe, one small spray or a tiny amount of lightweight styling cream is usually enough. Comb it through so product does not sit in one patch. If you regularly blow-dry and straighten fragile lengths, the guidance in this leave-in treatment review for heat-styled hair is useful for understanding slip, softness and protective styling prep.
Choose the right round brush for your fringe length
The brush size controls how much bend you get. You are not trying to create a ringlet; you are trying to create lift at the root and a soft outward sweep through the ends.
- Short curtain fringe, around brow to upper cheekbone length: use a small-to-medium round brush so the hair can wrap around it without springing into a tight curl.
- Cheekbone to jaw-length curtain fringe: a medium round brush usually gives the most natural bend and movement.
- Long, grown-out face-framing layers: a larger round brush can create a softer salon-style curve without making the front pieces look too styled.
- Fine hair: avoid oversized brushes that flatten the root. A slightly smaller barrel can create more lift.
- Thick or coarse hair: choose a brush that gives enough grip and tension, but do not over-pull the front hairline, as this can make the fringe sit stiffly.
A concentrator nozzle on the hair dryer helps because it directs airflow where you need it. Keep the airflow moving down the hair shaft rather than blasting upwards from underneath, which can rough up the cuticle and make the fringe fluffy. If you are deciding whether your current dryer gives you enough control, this comparison of two full-size hair dryers for home blow-dries explains the kind of airflow and handling differences that matter in everyday styling.
The round-brush method, step by step
1. Dry the roots forward first
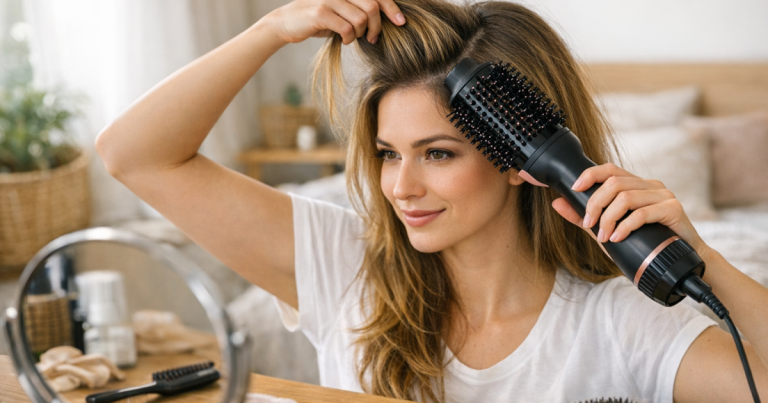
Brush the whole fringe section forward over your forehead. Place the round brush under the roots and aim the dryer at the root area while gently pulling the hair forward. This may look opposite to the final result, but it stops the fringe from splitting too early and helps lift the roots away from the scalp.
Do this for a few passes until the roots are mostly dry. For stubborn centre partings or cowlicks, move the brush side to side across the forehead as you dry. This breaks the fixed parting pattern and gives you more control before you create the curtain shape.
2. Lift up and over for volume
Next, lift the fringe up and slightly back with the round brush. Roll the brush at the roots and direct the dryer at the base of the section. Keep the tension gentle but firm. The aim is root lift, not a tight curl.
Fine hair usually needs only a brief lift here. Thick hair may need a few more passes, especially if the fringe is dense. If your hair gets puffy easily, keep the dryer nozzle angled down the hair rather than underneath it.
3. Split the fringe while it is still warm
Once the roots have lift, divide the fringe where you want it to open. This does not have to be a sharp middle parting. Many curtain fringes look softer with a slightly off-centre split, especially if your natural parting is not perfectly central.
Take one side of the fringe, place the brush underneath or slightly behind the section, then roll the ends away from the face. Aim the dryer along the curve of the brush. Repeat on the other side, mirroring the movement so both sides sweep outwards.
4. Overdirect for a softer frame
For the most flattering bend, pull each side of the fringe across the face before rolling it away. For example, when drying the right side, bring it slightly towards the left before sweeping it back to the right. This overdirection creates a softer drape when the hair falls back into place.
If you dry each side exactly where it will sit, the shape can look too fixed. Overdirection gives the fringe a more relaxed, face-framing finish and helps the longer side pieces blend into layers.
5. Let the shape cool
After each side is dry, hold it around the brush for a few seconds with the dryer switched off, or use the cool-shot setting if your dryer has one. You can also roll each side away from the face and secure it with a lightweight clip while you finish the rest of your hair.
This cooling stage is the difference between a fringe that looks good for five minutes and one that holds its shape. Do not rake through the fringe immediately while it is still warm. Let it settle, then loosen it with fingertips.
Adjust the technique for your hair type
Fine or flat hair
Focus on lift at the roots and keep product minimal. Blow-dry the fringe forward first, then up and back, before creating the outward sweep. A light mist of flexible hairspray on the underside can help without making the fringe look crispy. Avoid heavy oils near the fringe, as they can separate fine front pieces quickly.
Thick or heavy hair
Work in two small layers if the fringe is dense: dry the lower part first, then the top layer. This stops the outer hair looking polished while the underneath remains damp and drops later. Use enough tension with the brush to smooth the hair, but keep the finish soft by cooling each side before releasing it.
Wavy hair
Decide whether you want the fringe to blend with your natural wave or look more blow-dried. For a polished finish, smooth the roots with the round brush and keep the airflow controlled. For a softer wavy result, dry the roots only, then shape the ends with your fingers or clip them away from the face while they cool. If you are weighing up when heat is worth using, the site’s guide to heatless and heated styling for different finishes can help you choose a lower-effort routine.
Curly hair
A round brush can stretch a curly fringe, so use it only if you want a smoother curtain effect. Keep sections small, use moderate tension and avoid repeatedly going over the same area. If you want the fringe to stay curlier, dry the roots in the direction you want, then twist or finger-coil the ends away from the face instead of fully brushing them out.
Oily roots or second-day hair
Refresh the roots before adding more styling product. A tiny amount of dry shampoo can help absorb oil, but brush it through properly so it does not leave a powdery finish. Mist the fringe lightly with water, then repeat the root-direction steps. Re-drying the roots is usually more effective than trying to hide a flat fringe with more spray.
Common round-brush mistakes and quick fixes
- The fringe curls under too much: your brush may be too small, or you may be rolling the ends too tightly. Use a larger brush or release the hair sooner.
- The fringe falls flat: you may be shaping the ends before drying the roots. Rewet the roots, dry forward first, then lift up and back.
- One side flicks better than the other: this is often caused by your natural parting or hand position. Spend extra time drying the awkward side in the opposite direction before shaping it.
- The front looks fluffy: reduce upward airflow and aim the nozzle down the hair shaft. Use less product and avoid brushing once the hair is fully dry.
- The fringe separates into strings: too much oil, serum or heavy cream may be sitting near the roots. Cleanse or refresh the fringe section and use lighter prep next time.
How to make the shape last
Once the fringe is cool, loosen it with your fingertips rather than a comb. Pinch the ends lightly and guide each side away from the face. If you need hold, spray a flexible hairspray onto your fingers or onto the brush, then skim it through the fringe. Spraying directly at close range can make the front look stiff.
For humid days, focus on smoothing and setting the root area. A fringe that has cooled in the right direction will usually behave better than one that has simply been curled at the ends. If your hair drops quickly, clip each side away from the face while you do make-up or get dressed, then remove the clips just before leaving.
At night, avoid sleeping with the fringe pressed flat across your forehead. Push it loosely back or to the sides. In the morning, mist only the root area and repeat the first two drying steps. You often do not need to restyle the full fringe from scratch.
Common questions
Should a curtain fringe be styled wet or dry?
It is easiest to shape when damp, especially at the roots. If the fringe is already dry, mist the roots lightly with water before using the round brush so the direction can reset.
Why does my curtain fringe split too much in the middle?
The roots are probably drying into your natural parting before you shape them. Dry the whole fringe forward first, moving the brush side to side, then create the split once the roots have lift.
Can I use a round brush without a hair dryer?
You can use it to smooth and guide the fringe, but the shape will not set as reliably without heat or airflow. For a no-heat option, dampen the fringe, clip each side away from the face and let it dry fully before releasing.
How do I stop my fringe looking too bouncy?
Use a larger brush, reduce the amount of rolling at the ends and pull the brush down and away rather than curling it under. Let the hair cool in a softer stretched shape.
Is a round brush better than straighteners for a curtain fringe?
A round brush gives more lift and softness at the root. Straighteners can create a cleaner bend, but they can also make the front pieces look flatter if used too close to the scalp.
What stands out
A good curtain fringe is built from the roots, not just flicked at the ends. Dry it forward to reset the parting, lift it up for volume, then sweep each side away from the face and let the shape cool before touching it. Once you understand that order, a round brush becomes much easier to control, whether your fringe is fine and floaty, thick and heavy, softly wavy or growing out into longer face-framing layers.