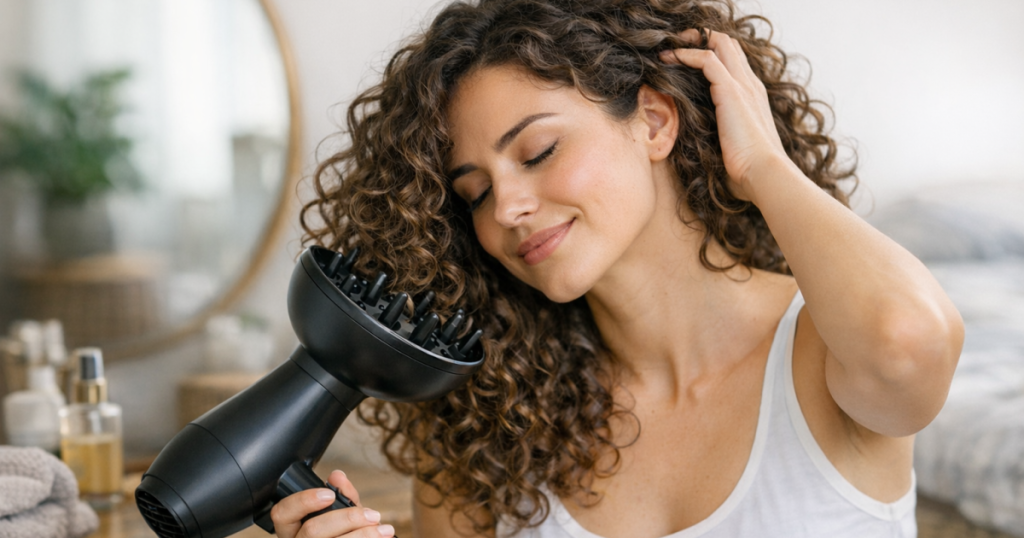
A good diffuser finish starts before you switch the dryer on: wet curls, even product distribution and low airflow matter more than speed. The aim when you diffuse curly hair is to dry the curl pattern in place, not blast it into shape.
Frizz usually comes from disruption. If the cuticle is roughened by towel-rubbing, heavy handling, high airflow or touching while the hair is half-dry, curls lose their clumps and create that soft halo before the shape has had time to set.
The short version
- Start with very wet, product-coated hair so curl clumps stay together.
- Use low airflow first; heat can be moderate, but the air should not be forceful.
- Hover-dry before cupping curls to reduce disturbance.
- Move the diffuser slowly and let each section dry before changing position.
- Stop touching while the hair sets, then soften any cast only once curls are fully dry.
Set up your curls before drying
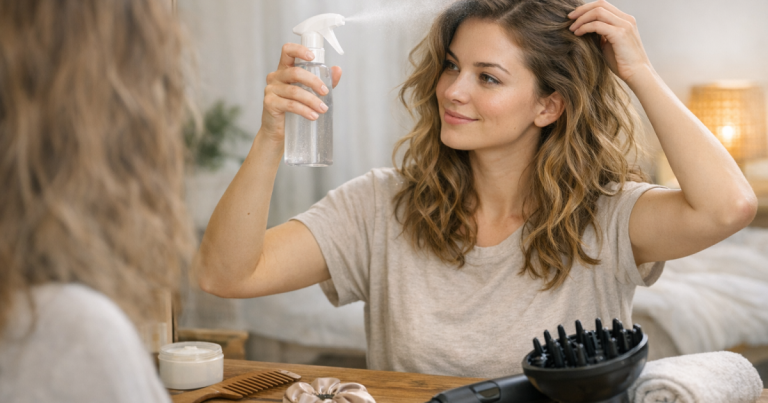
The biggest frizz-prevention step happens at the sink or styling area. Apply leave-in conditioner, curl cream, mousse or gel while hair is still wet enough to clump. If the surface starts drying before product is evenly spread, mist it with water rather than adding more product on top of dry patches.
Use your hands, a wide-tooth comb or a suitable detangling brush to distribute product from roots to ends, then scrunch upwards to encourage the pattern. Fine curls and waves usually need lighter layers, such as a small amount of leave-in followed by mousse or a light gel. Dense, coarse or very dry curls can often handle richer cream under gel, but the key is even coating, not simply using more.
After product, remove excess water with a microfibre towel or soft cotton T-shirt by gently pressing, not rubbing. You want the hair damp to wet, not dripping down your neck. If curls separate into stringy pieces, glaze a little water over the top and scrunch once more before drying.
Use the dryer in the right order
1. Start with hover-drying
Attach the diffuser, select low speed and choose low to medium heat depending on your hair’s tolerance. Hold the diffuser near the hair without pushing curls into the bowl. This first stage dries the outer layer and begins setting the product cast while keeping the curl clumps intact.
Hover around the sides, back and crown for several minutes. Avoid shaking the dryer through the hair. Think of the diffuser as a soft, indirect source of air rather than a tool for scrubbing volume into the roots.
2. Cup the curls only when they have started to set
Once the hair is no longer dripping and the curl shape looks stable, place a small section into the diffuser bowl. Lift the bowl towards the scalp, hold it still, then switch the dryer on if your dryer is easy to control that way. If not, use the lowest airflow and move very slowly.
Hold each section in place for around 20 to 40 seconds, then release gently. The exact timing depends on density and length, but the principle is the same: fewer movements create less frizz. Do not bounce the diffuser up and down or repeatedly scrunch the same section while it is drying.
3. Tilt instead of aggressive flipping
For root lift, tilt your head to one side and place the diffuser near the roots, keeping the lengths supported. Then tilt to the other side and repeat. This gives the roots space without roughing up the top layer.
Fine curls are especially prone to collapsing at the crown, so use lighter product near the roots and avoid pressing wet hair flat against the scalp. If you also use heated tools on fine hair, the same low-disruption approach applies; this guide to protecting fine hair when using multi-stylers explains how to balance styling with condition and volume.
4. Leave the cast alone until the hair is dry
A gel or mousse cast can look crunchy while drying, but it is doing useful work. It keeps the curl surface smooth while moisture leaves the hair. Breaking the cast too early is one of the quickest ways to create frizz, because the curl is still soft underneath.
When hair feels completely dry, rub a tiny amount of lightweight oil or serum between your palms and gently scrunch out the stiffness. If your hair is fine or easily weighed down, use clean hands first and add product only if the ends feel rough.
Adjust the method for your curl type
Wavy hair and loose curls
Waves often need more support from product and less handling from the diffuser. Start with mousse or a light gel, hover-dry for longer, then cup only the mid-lengths and ends. If you want volume, dry the roots while tilting sideways rather than flipping upside down from the start, which can make the top layer fluffy.
Fine curly hair
Fine curls benefit from low speed, shorter drying bursts and lightweight styling layers. Too much cream can make the hair look stretched and soft rather than defined. Focus product on the lengths, keep the diffuser moving slowly around the head, and stop before the hair becomes hot to the touch.
Thick, dense or tight curls
Dense curls usually need more time, more sectioning and more patience. Work in smaller areas so the airflow can reach the inner layers. You may need to lift sections gently at the root with your fingers, but avoid combing through once the pattern has formed. If the outside dries quickly while the underneath stays damp, pause and let the hair cool for a minute before continuing.
Short curly hair
Short curls can lose shape if the diffuser bowl is too large or the airflow pushes the curl in the wrong direction. Hover first, then press small sections into the diffuser without flattening them against the scalp. For very short layers around the face, use your fingertips to guide the shape, then let the air set it rather than repeatedly reworking it.
Frizz triggers to check while you dry
- Airflow is too strong: choose low speed even if drying takes longer.
- Hair is too dry before product: re-wet with a spray bottle so curls can clump again.
- You are touching too often: set each section, then leave it alone.
- The diffuser is being pushed through the hair: place, hold, release.
- Your towel is roughening the surface: switch to a microfibre towel or soft T-shirt.
- Product is uneven: smooth a small amount over frizz-prone areas before drying, not after they have puffed up.
UK weather can make the final finish trickier, especially on damp or misty days. A little extra hold from gel or mousse can help curls keep their shape once you step outside, but avoid layering heavy products over dry hair as a quick fix; it often creates dullness without solving the frizz.
What your diffuser and dryer should do well
You do not need the most expensive dryer to get a smoother result, but the tool should allow controlled airflow. A diffuser attachment that stays secure, a bowl that supports your curl length and speed settings that are gentle enough for textured hair all matter more than a dramatic blast of power.
If you often style away from home, do not assume a hotel dryer will behave like your usual setup. Many have concentrated nozzles, limited settings or no compatible diffuser. The comparison of a mini hair dryer versus a hotel dryer is useful if you want predictable drying on trips without relying on whatever is in the room.
How to finish without undoing the work
Let the curls cool before you judge the shape. Hair can feel dry on the outside while still holding moisture inside the curl. If you fluff too early, the internal dampness swells and the finish becomes fuzzy within minutes.
Once dry and cool, lift at the roots with fingertips or a wide-tooth comb placed close to the scalp. Do not rake through the lengths. For more volume, flip gently from side to side rather than shaking the curls apart.
At night, use a loose pineapple, satin bonnet, silk hair wrap or smooth pillowcase to reduce friction. The next morning, refresh only the areas that need help. For a no-wash reset, use the steps in reviving second-day waves without rewashing; the same light misting and selective reshaping works well for many loose curls too.
Common questions
Should I diffuse on soaking wet or damp hair?
Start wet enough for curl clumps to hold together, but not so wet that water is dripping heavily. Press out excess water after product with a soft towel or T-shirt.
Is cold air better for frizz?
Cool air is gentle, but it can take a long time. Low airflow with low to medium heat is often more practical, followed by a cool finish once curls are nearly dry.
Why does my hair look frizzy only at the crown?
The crown is easily disturbed by flipping, towel-rubbing and heavy root product. Hover-dry this area first, use lighter styling layers and avoid touching it while it sets.
How dry should curly hair be before I stop diffusing?
Aim for fully dry if you want longer-lasting definition. Stopping at 80 or 90 per cent dry can feel softer, but it often allows frizz to appear as the remaining moisture evaporates.
Can I diffuse curly hair every wash day?
Yes, if your hair tolerates it and you use gentle airflow, sensible heat and conditioning products. If your ends feel rough or dry, reduce heat, shorten sessions or alternate with air-drying.
The big picture
Frizz-free diffusing is less about forcing curls into place and more about protecting the shape that forms when hair is wet. Set the curl clumps early, use low airflow, dry in calm stages and resist touching until the cast has done its job. Once you build the habit, your diffuser becomes a finishing tool rather than a frizz trigger.