Layered hair can look gorgeous with heatless curls, but the shorter pieces are usually the ones that pop out, kink or curl in the wrong direction. A silk curling ribbon helps because it gives the hair a smooth anchor to wrap around while you control where each layer sits. The trick is not to wrap faster; it is to place the band correctly, use smaller sections around the face, and secure the ends so the shortest layers do not escape overnight.
This method works best when your hair is lightly damp or fully dry with a little styling mist, not wet. Layers need enough grip to stay wrapped, but too much moisture can leave them stretched, flat at the crown, or still damp by morning.
What to know first
- Start with detangled hair so each layer wraps smoothly instead of snagging halfway down.
- Place the ribbon high enough to support face-framing pieces, but not so high that the roots become bumpy.
- Wrap in small sections if your layers are choppy, heavily textured or shorter around the face.
- Use a soft scrunchie or mini claw clip at the ends; tight elastics can leave dents.
- Expect looser, more natural curls on long layers and a bendier wave on shorter ones.
If your hair tangles easily before styling, detangle from the ends upwards and avoid dragging through knots. A flexible brush can help before you start; for a realistic look at where that type of brush helps and where it has limits, see our Wet Brush Original Detangler review.
Prep your layered hair properly
Preparation matters more with layers than with one-length hair because every shorter piece has a different route around the ribbon. If your ends are rough, frizzy or overloaded with product, they are more likely to spring out during the wrap.
Start with the right moisture level
For most hair types, the safest starting point is around 80–90% dry. Fine hair often works better almost completely dry with a light mist of water or styling spray on the mid-lengths. Thick or coarse hair may need slightly more moisture, but it should never feel wet to the touch. If you wrap wet hair tightly, the inner layers may not dry properly and the curl can collapse as soon as you take the ribbon out.
Add grip without stiffness
Layered hair needs a little hold, especially around the face and crown. Use a small amount of lightweight mousse, curl cream or styling spray through the lengths, then brush or comb it through so there are no sticky patches. Avoid heavy oils before wrapping unless your hair is very coarse; too much slip can make the layers slide off the ribbon before they have set.
Decide your parting before you wrap
Set your usual parting first. If you wrap with a centre parting and then flip to a side part in the morning, shorter layers can sit unevenly. For curtain bangs or face-framing layers, let them fall where you normally wear them and wrap them deliberately rather than pulling them back with the rest of the hair.
Step-by-step: wrapping layered hair so pieces stay in
Once the hair is prepped, the aim is to create controlled tension without pulling too tightly. Layered cuts do not need a perfect salon-level spiral; they need consistent placement and secure ends.
1. Position the ribbon like a headband
Place the ribbon over the top of your head so the middle sits close to the crown, then clip it in place with a small claw clip. For layered hair, it usually helps to position it slightly forward rather than far back. This gives shorter front pieces a shorter distance to travel and reduces the chance of them dropping out.
2. Split the hair into two balanced sides
Divide your hair down the back into two sections. Do not worry if your layers make the sections look uneven; focus on matching the amount of hair on each side. If one side is much thicker, the curl pattern will set differently.
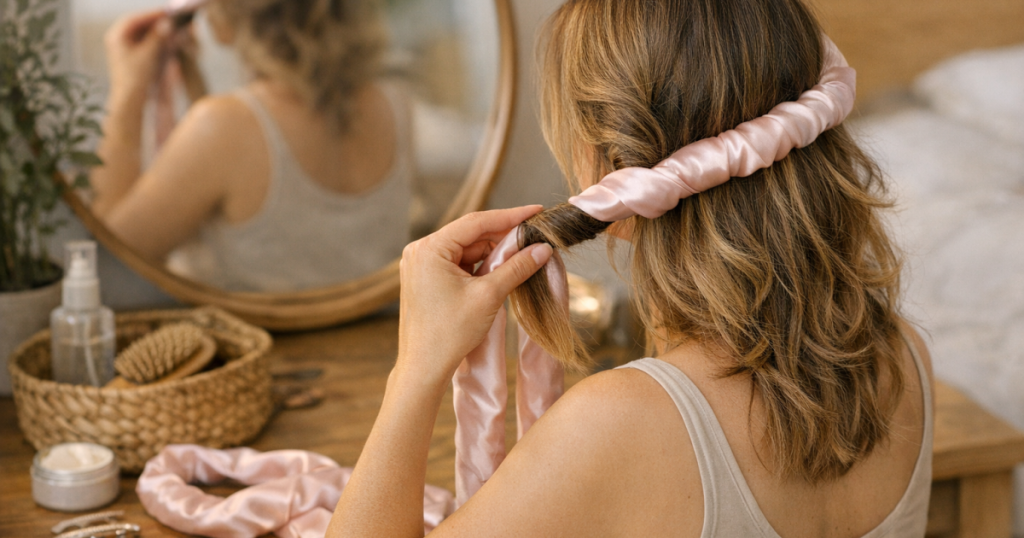
3. Begin with a small face-framing section
Take a narrow piece from the front, wrap it away from your face around the ribbon, then add another small piece before the next wrap. This is similar to a French braid motion, but you are wrapping around the ribbon rather than crossing strands over one another. Smaller sections make the biggest difference on layered hair because they catch the short pieces before they can slip free.
4. Keep adding hair as you work down
Continue wrapping away from your face, adding hair with every pass. Keep the tension even: snug enough that the hair sits against the ribbon, but not so tight that the roots pull or the curl forms a sharp ridge. If a short layer sticks out, pause and tuck it under the next wrap rather than trying to smooth it later.
5. Secure the ends carefully
When all the hair on one side is wrapped, coil the remaining length around the ribbon and secure it with a soft scrunchie. Make sure the final 3–5 cm of hair is tucked in, as this is where layered ends often flick out. Repeat on the other side and check that both sections feel equally secure.
6. Let it set without flattening the crown
If you are wearing the style overnight, keep the top clip in until the wraps feel stable, then remove it if it feels uncomfortable. For daytime setting, leave the ribbon in for several hours and avoid touching the wrapped sections. The longer the hair stays wrapped while dry or nearly dry, the more defined the result will be.
How to adjust the method for your layer type
The same basic technique works for most layered cuts, but the section size and tension should change depending on your hair length, density and cut shape.
Long layers
Long layers are the easiest to wrap because the shorter pieces still have enough length to travel around the ribbon. Use medium sections and focus on keeping the ends tucked. If you want soft waves rather than bouncy curls, wrap more loosely and brush through gently after removing the ribbon.
Short face-framing layers
Face-framing pieces need smaller sections and a slightly more forward ribbon position. If these pieces are too short to wrap cleanly, twist them lightly before guiding them around the ribbon. You can also leave the very shortest fringe pieces out and style them separately in the morning with a damp finger reset.
Choppy or heavily textured layers
Choppy layers tend to poke out because the ends sit at many different lengths. Use narrower sections, add hair more often, and smooth each wrap before moving on. A small amount of styling cream on the ends can help, but keep it light so the shape does not become greasy or limp.
Fine layered hair
Fine hair can look flat at the roots if wrapped too tightly. Keep the ribbon lifted slightly at the crown and avoid overloading the hair with leave-in products. When you remove the ribbon, shake out the roots with your fingertips rather than brushing from the scalp down.
Thick or dense layered hair
Dense hair may need smaller, more numerous sections so the inner layers are not trapped damp. If your hair takes a long time to dry, start almost dry and use a light styling mist only where you need hold. Very thick hair can also be wrapped in four sections instead of two: front left, back left, front right and back right.
Taking the ribbon out without ruining the shape
Removal is where many heatless curls become frizzy. Do not pull the ribbon straight down through the hair. Instead, remove the scrunchie, unwind each side gently, and let the curl fall into your palm. If a layer has caught underneath another piece, separate it with your fingers rather than dragging it free.
Once both sides are released, wait a minute before styling. The curls often look too uniform at first, then soften naturally. Use your fingers to separate the curls from underneath, not from the top surface. For a more lived-in finish, tilt your head forward, shake lightly at the roots, then let the hair fall back into place.
If you want to protect the set while sleeping, a smooth wrap or bonnet can reduce friction from bedding. Our guide to sleeping in heatless curls without frizz covers pillowcase, bonnet and refresh choices in more detail.
Common mistakes that make layered curls uneven
- Wrapping sections that are too large: Shorter layers get buried instead of being caught by the ribbon, so they fall out or curl weakly.
- Starting with hair that is too wet: The outside may dry while the inner layers stay damp, leaving a patchy result.
- Pulling the front pieces too far back: This can make face-framing layers flick away awkwardly rather than curving around the cheekbones.
- Using tight elastics at the ends: They can create dents exactly where layered ends are most visible.
- Brushing too soon: A brush can turn fresh heatless curls into fluff, especially on porous, highlighted or wavy hair.
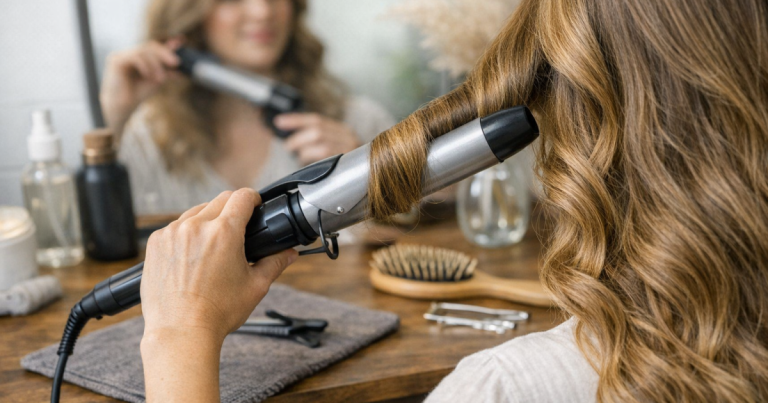
How the result compares with other styling methods
A ribbon set gives a softer, less uniform finish than a curling tong, which can be flattering on layered cuts because the curls do not all sit at the same height. It is also gentler than regular heat styling, useful if your ends are colour-treated, dry or prone to snapping. The trade-off is control: a heat tool lets you correct individual pieces quickly, while heatless wrapping relies on prep, sectioning and setting time.
If your layers are very short or you want polished event hair, a large-barrel tong may still be easier for targeted shaping. For everyday volume and lower heat exposure, the silk curling ribbon method is a strong option, especially once you learn how small your sections need to be.
Finishing touches for a softer, longer-lasting result
Use a small amount of lightweight serum or oil only after the curls have formed, concentrating on the ends and avoiding the roots. If your hair drops quickly, mist hairspray onto your hands and scrunch lightly rather than spraying directly into the top layer. For frizz-prone hair, smooth the canopy with flat palms instead of raking through repeatedly.
On humid UK mornings, it can help to leave the curls slightly more defined than you want before leaving the house. They will usually relax during the commute or school run. If one short layer has sprung out, dampen just that piece, twist it around your finger away from the face, and let it dry while you finish getting ready.
FAQ
Can you use a heatless ribbon on shoulder-length layered hair?
Yes, as long as the shortest layers can wrap at least part-way around the ribbon. Use small sections, place the ribbon slightly forward, and secure the ends carefully so they do not flick out.
Should layered hair be wet or dry before wrapping?
Lightly damp or almost dry is best for most hair. Wet hair can take too long to dry inside the wrap, while bone-dry hair may need a light mist or styling product to hold the curl.
Why do my front layers fall out overnight?
The front sections are probably too large, too dry, or being pulled too far back. Start with smaller face-framing pieces and wrap them away from the face before adding heavier sections.
How do I stop the ends looking bent?
Tuck the final few centimetres neatly around the ribbon and secure with a soft scrunchie rather than a tight elastic. If needed, smooth the ends with a tiny amount of styling cream before wrapping.
Will a silk ribbon work on naturally wavy hair?
Yes, but use it to organise the wave rather than fight it. Follow your natural parting, use light hold, and separate with fingers after removing the ribbon to avoid puffiness.
Main lessons
Layered hair needs more deliberate wrapping than one-length hair, but it can hold beautiful heatless shape when the ribbon is positioned well and the sections are small enough. Focus on catching the shortest pieces early, keeping the ends tucked, and removing the ribbon gently. If protecting styled hair overnight is a priority, you may also find our LilySilk silk hair wrap review useful for understanding how a smoother covering can help reduce friction after styling.