A bob can look sleek one minute and flat the next, mostly because the weight sits close to the jaw and the roots collapse as soon as they are over-smoothed. The trick when you blow-dry a bob is to build lift at the roots first, then polish the lengths and ends with controlled airflow rather than blasting the whole shape into place.
Think of it as two finishes working together: airy roots, neat mid-lengths and a softly bevelled edge. You do not need salon-level speed, but you do need sectioning, the right nozzle angle and a brush technique that suits your hair density.
The short version
- Start with hair damp, not dripping, so the roots can lift before the ends become overworked.
- Rough-dry the roots to about 70% dry while lifting them with your fingers.
- Use a concentrator nozzle, not bare airflow, for smoother lengths and fewer flyaways.
- Dry each section from root to end, keeping the dryer moving down the hair shaft.
- Roll the brush at the roots for lift, then glide through the ends for polish.
- Let the shape cool before touching it, brushing it out or tucking it behind your ears.
Start with the right level of dampness
The best bob blow-dry usually begins after towel-drying, not straight from soaking wet hair. Squeeze out water with a microfibre towel or soft cotton T-shirt, then detangle gently from ends to roots. If your hair is very fine, avoid loading it with heavy creams at this stage because they can make the finished shape look clean but limp.
Aim for evenly damp hair with no dripping sections at the nape or around the hairline. Those wetter patches take longer to dry, so you end up passing the dryer over nearby dry hair too many times. That is when a bob can become fluffy at the surface but flat at the crown.
If you use heat protection, mist it lightly and comb it through so it does not sit in one patch. Fine hair often needs a lighter application than coarse or porous hair; if that is your concern, the ghd Bodyguard Heat Protect Spray review for fine hair explains the kind of weight and finish to watch for.
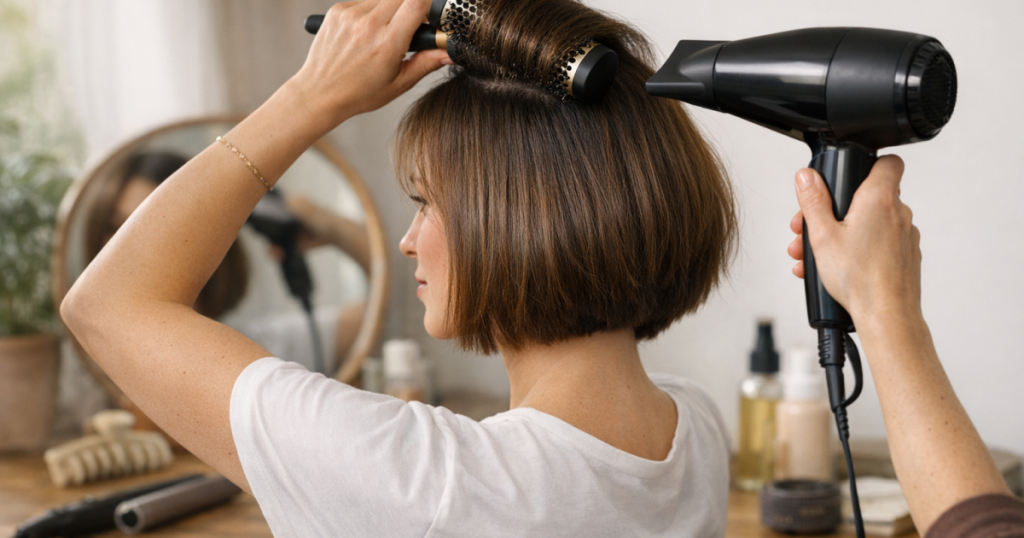
Set up your dryer so the airflow works with the cut
A bob shows airflow mistakes quickly. Dry against the direction of the cuticle and the surface can look rough; dry everything straight down from the crown and the roots can collapse. Fit the concentrator nozzle and use medium heat with a strong but controllable airflow. High heat is not automatically better, especially on shorter hair where the dryer sits closer to the scalp and ends.
Hold the nozzle so it points from root to tip along each section. That direction helps smooth the surface while keeping the line of the bob tidy. If you are unsure which attachment suits your hair texture, our guide to choosing the right hair dryer nozzle for your hair type is a useful next step before changing your whole routine.
Step-by-step: smooth shape, lifted roots
1. Rough-dry the roots first
Before you pick up a round brush, lift the roots with your fingers and dry them until they feel mostly dry. Tip your head slightly from side to side rather than flipping it fully upside down, which can create too much bend in a short bob and make the underneath sit oddly.
Focus on the crown, parting and sides around the temples. Use your fingers like a loose rake, lifting the hair away from the scalp while aiming airflow at the root area. Stop before the lengths are fully dry; you still need enough moisture left to shape them.
2. Section the bob by shape, not just by habit
For most bobs, three working zones are enough: the underneath, the sides and the top/crown. Clip the top away first, then dry the nape and lower side sections. This prevents the top layers from drying randomly while you are still working underneath.
If your bob is blunt, keep sections clean and horizontal so the bottom edge dries evenly. If it is layered or softly graduated, use slightly diagonal sections around the sides so the hair falls naturally rather than forming a hard ledge.
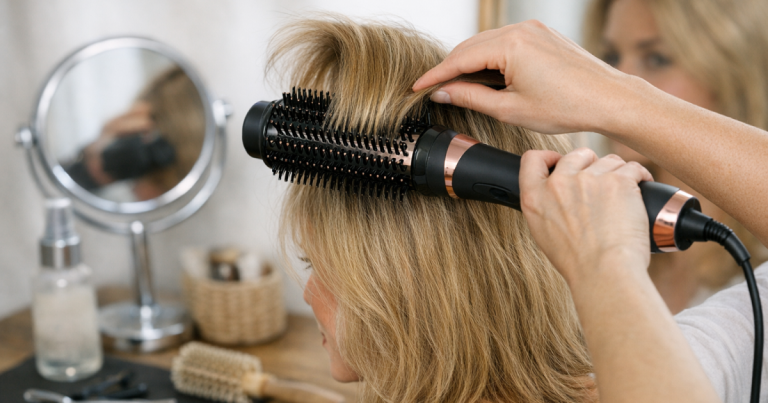
3. Create root lift before smoothing the ends
Place the brush under the section at the root, lift up and away from the scalp, then direct the dryer at the root for a few seconds. Keep the brush still while the root area dries, then roll or glide through the mid-lengths. This order matters: if you smooth the ends first, the roots often dry flat before you have shaped them.
For volume at the crown, over-direct the section slightly forward or to the opposite side before drying it back into place. This gives lift without backcombing or making the surface look messy.
4. Smooth the lengths with tension, not pressure
Use enough brush tension to hold the section firm, but do not pull so hard that the root lift disappears. Keep the dryer following the brush down the hair, with the nozzle angled in the same direction as the cuticle. Work slowly enough for the section to dry, but do not keep reheating hair that already feels dry.
For a classic smooth bob, turn the brush slightly under at the last few centimetres. For a straighter, more modern finish, glide the brush through the ends with only a small curve. Too much rolling can make a bob look overly rounded, particularly if it sits at chin length.
5. Cool each section before releasing it
Hair sets as it cools. Once a section is dry, hold the shape for a few seconds with cool air or simply keep it on the brush away from heat before letting it drop. This small pause helps the bevel last and stops the root from sinking immediately.
When all sections are dry, wait a minute before brushing through. Use your fingers first, then a soft brush only if needed. If you brush too soon, you can undo the shape while the hair is still warm.
Adjust the technique for your hair type
Fine or flat hair
Use less product, smaller sections and more root over-direction. Keep conditioner away from the roots on wash day if your hair collapses quickly. A smaller round brush can help short layers lift, but avoid wrapping the ends too tightly or the shape may look curled rather than smooth.
Thick or coarse hair
Take thinner sections and spend more time pre-drying before detailed brush work. Thick bobs often puff out when the underneath is not fully dry, so check the nape before moving on to the top. A larger round brush or paddle-style blow-dry brush can smooth more surface area, but the roots still need lift first.
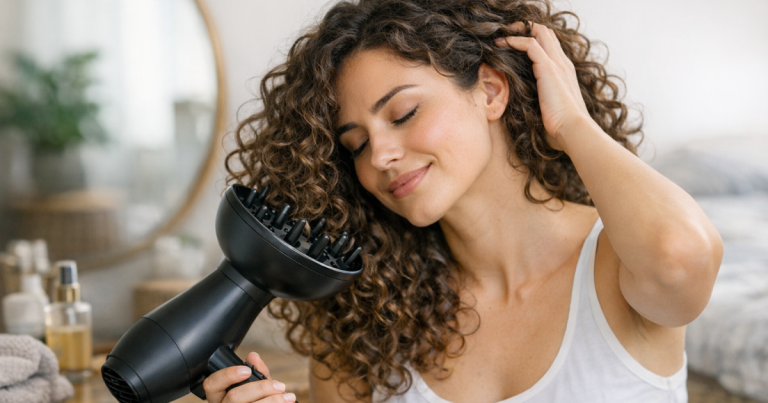
Wavy or frizz-prone hair
Do not blast the surface in every direction. Keep the nozzle attached, dry down the hair shaft and maintain steady tension. If your natural wave springs back around the hairline, dry those areas early while they are still damp, then leave them alone as much as possible.
Layered bobs
Layering needs a softer approach than a blunt bob. Dry the shorter crown pieces with upward lift, then blend them into the longer layers by rolling the brush only slightly. If you over-bevel every layer, the silhouette can become too round at the sides.
Common bob blow-dry problems and quick fixes
- Flat crown: dry the crown first, over-direct sections and let them cool before parting the hair.
- Puffy sides: use narrower sections and point the nozzle down the hair shaft rather than outwards.
- Ends flicking the wrong way: check your brush angle. Roll under for softness, or glide straight down for a cleaner edge.
- Greasy-looking roots after styling: reduce product near the scalp and make sure hair is fully dry before finishing.
- One side sitting better than the other: change your hand position. On the awkward side, stand slightly behind the section and pull the brush forward before turning it under.
If your dryer feels weak, takes a long time to dry the roots or leaves the surface rough even with a nozzle, technique may not be the only issue. A capable mid-range dryer can still give a polished bob at home; the Remington Proluxe Hair Dryer review gives a realistic example of what to expect from that type of tool.
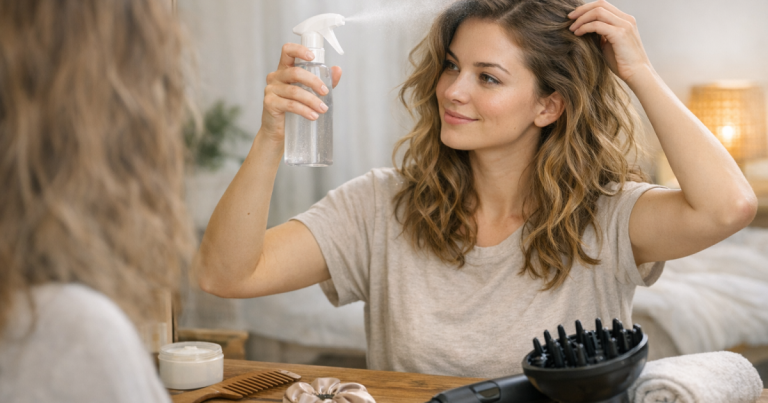
Finishing without flattening
Once the bob is dry, use finishing products sparingly. A light mist of flexible hairspray can help hold root lift, but spray from a distance and avoid soaking the top layer. If the ends need shine, warm a tiny amount of serum between your palms and touch only the last few centimetres.
For extra crown volume, lift the top section and let a small amount of dry texture spray settle at the roots, then press the hair back into place with your fingers. Avoid heavy smoothing oils near the parting; they can make freshly dried hair look second-day before you have left the house.
Questions people ask
Should I use a round brush or paddle brush on a bob?
Use a round brush if you want root lift and a softly tucked-under edge. Use a paddle brush if your bob is longer, thicker or naturally straight and you mainly want smoothness with less curve.
Why does my bob go flat after blow-drying?
The roots are probably drying too close to the scalp, or the hair is being over-smoothed before lift is created. Dry the roots first, over-direct the crown and let each section cool before touching it.
Can I get volume without mousse?
Yes. Mousse can help, but root direction, section size and cooling time make a big difference. Fine hair often looks better with minimal product and stronger technique.
How dry should my hair be before using a brush?
Rough-dry until the roots are mostly dry and the lengths are still slightly damp. If hair is too wet, brush styling takes too long; if it is too dry, the shape will not set as well.
How do I stop the ends looking too curled under?
Use a larger brush or reduce the amount of rotation at the ends. Glide through the final few centimetres rather than rolling the brush tightly against the jawline.
What to remember
To blow-dry a bob smoothly without losing volume, treat the roots and ends as separate jobs. Lift and dry the roots first, then smooth the lengths with controlled nozzle direction and measured brush tension. The finish should look polished but not pressed flat: movement at the crown, clean sides and ends that sit deliberately rather than flicking or ballooning.
The most useful habit is patience at the cooling stage. A bob can be beautifully shaped while warm, then drop within minutes if it is brushed, tucked or product-loaded too soon. Let the style settle, make small adjustments with your fingers, and keep the final product layer light.