Frizz during diffusing usually comes from disruption: too much touching, too much airflow, or a cast that breaks before the wave has set. The easiest way to diffuse wavy hair without frizz is to style wet, keep the airflow gentle, and let the diffuser support the curl pattern rather than blasting it around. Think of the dryer as a setting tool, not a speed-drying shortcut.
Wavy hair sits in a tricky middle ground: it often needs lift and encouragement, but it can puff out if treated like straight hair or over-scrunched like tighter curls. A good routine balances moisture, hold and patience.
The short version
- Start with wet hair, not half-dry hair, if your waves lose shape quickly.
- Use enough styling product to create light hold, but avoid overloading fine or low-density hair.
- Begin with a hover-dry technique before cupping the ends in the diffuser bowl.
- Keep airflow low or medium and heat gentle, then finish with a cool setting if your dryer has one.
- Do not keep scrunching while the hair is drying; wait until it is fully dry before softening any cast.
The biggest shift is to stop treating the diffuser like a wind machine. The less your waves move while drying, the smoother the result tends to look.
Why wavy hair turns frizzy in the diffuser
Frizz is not always a sign that your hair is dry or damaged. Often, it is simply the outer layer lifting because the wave pattern has been disturbed before it has had a chance to set. Wavy hair can be especially reactive because the pattern is looser and easier to stretch, flatten or separate.
There are three common causes: hair that is too dry before styling, airflow that is too strong, and product that does not offer enough hold for your texture. A soft cream may be enough for coarse waves that naturally clump, but fine waves often need a lightweight gel or mousse to keep the pattern together.
Your density matters too. Fine, low-density hair can collapse under rich leave-ins, while thick, high-density hair may need more sectioning so the inner layers dry evenly. If you are not sure whether your issue is texture, density or both, the guide to matching styling tools to hair density and texture is a useful next step.
Prep your waves before the dryer comes out
1. Style on properly wet hair
For most wavy hair, damp is not wet enough. If the hair has already started drying, the surface can roughen and the clumps can separate before you add hold. After washing, gently squeeze out excess water with your hands, then apply styling product while the hair still feels wet and slippery.
If your waves are very fine, you do not need dripping hair, but you still want enough water for the product to spread evenly. If your hair is coarse, porous or prone to puffiness, applying product to wetter hair usually gives a smoother finish.
2. Blot, do not rough-dry
Use a microfibre towel or a soft cotton T-shirt to squeeze water out in sections. Avoid rubbing the hair between your hands or twisting it tightly in a towel. Friction before diffusing is one of the easiest ways to create halo frizz around the crown.
3. Choose hold before shine
A shine product can make the surface look smoother, but it will not necessarily keep waves together. If frizz appears as soon as the dryer starts, prioritise hold first. A lightweight mousse can suit soft, fine waves; a gel can help medium to thick waves form a cast; a small amount of cream underneath can help coarse waves feel less fluffy.
Use less product at the roots if your hair gets flat easily. Concentrate most of the hold through the mid-lengths and ends, where waves need the most support.
The step-by-step diffusing method
1. Set the dryer before it touches your hair
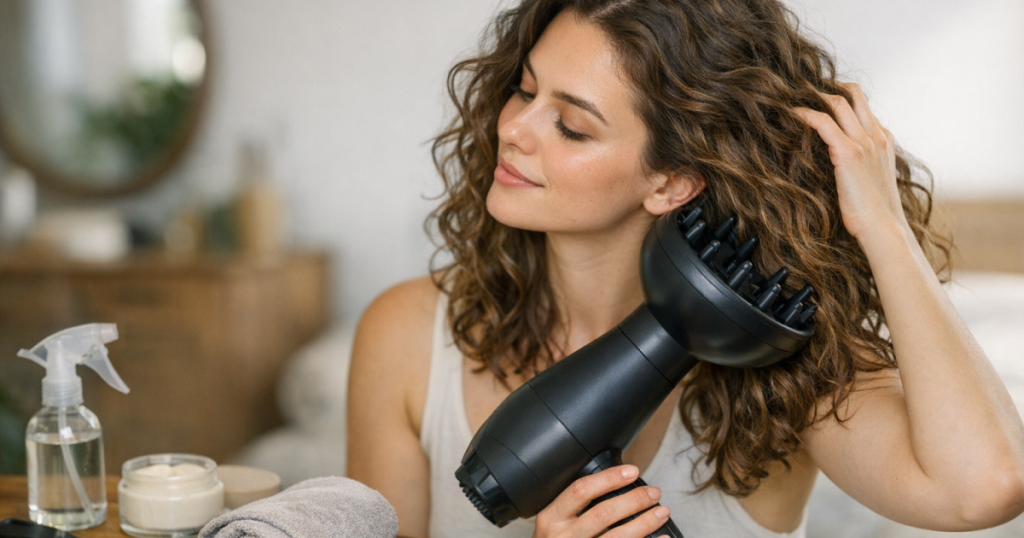
Attach the diffuser securely, choose low or medium airflow, and start with a low to medium heat setting. High airflow tends to scatter loose hairs and break up clumps, even when the heat itself is not too intense. If your dryer only has limited settings, hold the diffuser further away from the hair and work more slowly.
2. Hover-dry the roots first
Hold the diffuser around 10–20 cm from your head and move it around the scalp without touching the hair. This begins drying the roots while keeping the lengths still. It also reduces the temptation to scoop wet waves straight into the bowl, which can stretch or squash them before they have set.
Spend a few minutes here, especially around the crown, temples and underneath layers. If you want more detail on attachment angle and airflow control, this separate walkthrough on how to use a diffuser attachment on wavy hair breaks down the mechanics clearly.
3. Cup the ends gently
Once the roots are no longer soaking wet, place a section of ends into the diffuser bowl. Lift the bowl towards the scalp, then switch the dryer on if your model allows easy control. Hold still for several seconds, switch off or move away, then repeat on another section.
The key word is still. Do not bounce the diffuser, rake your fingers through the section, or keep changing direction. Let the hair rest in the bowl so the wave pattern dries in one piece.
4. Work in sections, not random patches
Move around your head in a loose pattern: one side, the back, the other side, then the crown. Thick hair may need smaller sections so the underneath does not remain wet while the surface dries. Fine hair often benefits from flipping the head side to side rather than upside down for the whole routine, as full upside-down diffusing can create tangles and uneven root lift.
5. Stop at the right dryness level
If your hair frizzes when you finish diffusing, you may be touching it too soon. Aim to dry until the hair is around 80–90% dry, then let the rest air-dry if you have time. If your waves fall flat easily, continue diffusing a little longer at the roots, but avoid overworking the ends.
6. Break the cast only when fully dry
If you used gel or mousse, the hair may feel slightly crisp once dry. That is not a mistake; it is the hold doing its job. Once the hair is completely dry, scrunch gently with clean hands to soften the cast. For extra slip, use a tiny amount of lightweight oil or serum on the palms, but keep it minimal if your waves are fine.
Adjust the technique for your wave type
Fine or low-density waves
Use lightweight hold and avoid heavy creams near the roots. Hover-dry for longer before cupping the ends, as wet fine hair can flatten quickly in the diffuser bowl. Keep the diffuser moving between sections rather than pressing it hard against the scalp.
Thick or high-density waves
Sectioning matters more than speed. Clip the top layers up loosely, dry the underneath first, then release sections gradually. If the outer layer dries while the inner layers stay damp, the finished shape can look expanded rather than defined.
Coarse or porous waves
These waves often need more moisture underneath the hold product. Apply a small amount of leave-in or curl cream, then layer gel over the top. Keep heat gentle and avoid repeatedly touching the surface, as raised cuticles can turn into visible fuzz very quickly.
Loose 2A waves
Do not force tight scrunching if your hair naturally forms soft bends. Focus on root lift, light hold and gentle cupping at the ends. Too much product or too much upside-down drying can make 2A hair look stringy at the ends and fluffy at the crown.
Stronger 2B to 2C waves
These patterns can usually handle more hold and more cupping. Encourage clumps while wet, then leave them alone. If the canopy frizzes but the underneath looks defined, try applying product in smaller sections so the top layer gets even coverage.
Small mistakes that make a big difference
- Starting with hair that is too dry: mist it lightly with water before adding product if it has begun to separate.
- Using high airflow: this is the quickest route to fluffy roots and broken clumps.
- Touching the hair constantly: every scrunch during drying can break the forming cast.
- Skipping hold product: conditioner alone rarely gives waves enough structure for diffusing.
- Overloading the crown: rich products at the roots can make waves flat first, then frizzy later.
- Diffusing until bone dry on high heat: this can leave the surface rough, especially on colour-treated or porous hair.
Keeping waves smooth after wash day
Frizz control does not end when the dryer goes off. Once your waves are dry, avoid brushing them out unless you are deliberately restyling. At night, use a loose satin scrunchie, silk wrap or satin pillowcase to reduce friction. If your waves are long enough, a loose pineapple can preserve root lift and stop the ends being crushed; the method is explained in the guide to pineapple curly hair overnight.
For refreshing the next day, mist your hands rather than soaking the whole head. Smooth water over frizzy sections, scrunch lightly, and add a small amount of mousse or gel only where the shape has dropped. Re-diffuse briefly on low airflow if needed, then leave the hair alone while it resets.
Things readers ask
Should I diffuse wavy hair upside down?
Upside-down diffusing can add volume, but it is not always the smoothest option. If your roots tangle or your canopy frizzes, try side-to-side diffusing instead and lift the roots gently with the diffuser.
Is low heat always better for frizz?
Gentle heat is usually kinder to frizz-prone waves, but airflow matters just as much. Low or medium airflow with steady positioning is often smoother than cool air blasted too strongly.
Why does my hair look good wet but frizzy dry?
Your wet clumps may not have enough hold to stay together as water evaporates. Try applying product to wetter hair, using a stronger hold layer, and reducing touch while drying.
Can I diffuse without gel?
Yes, but gel is helpful if your waves separate easily. Mousse, foam or styling cream may be enough for some hair types, but very soft hold can let frizz appear faster.
How long should diffusing take?
It depends on density, length and how wet your hair is when you start. Rather than chasing a fixed time, aim for roots that feel mostly dry and ends that are set but not overhandled.
The big picture
Smoother diffusing is mostly about restraint: wetter styling, gentler airflow, fewer touch points and enough hold to keep wave clumps intact. Once you know how to diffuse wavy hair without frizz, you can adjust the routine to suit your density, texture and preferred finish, whether that is soft beachy movement or more defined S-shaped waves.