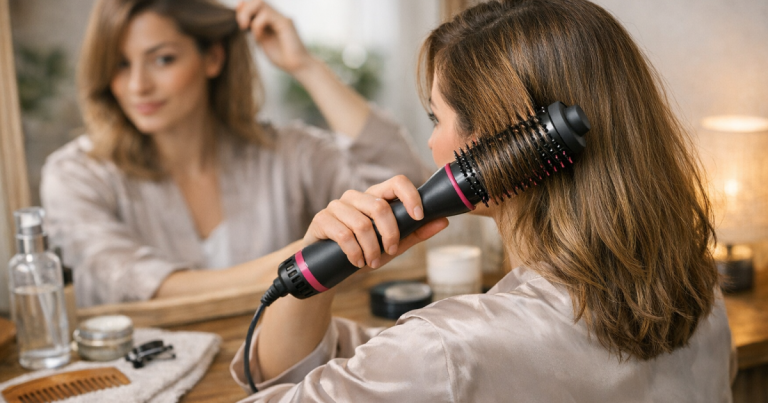

A fringe can look polished in minutes or behave as though it has its own weather system. The trick is to style a fringe with a hair dryer while the roots are still damp, because that is when you have the most control over direction, lift and separation.
Whether your fringe is blunt, curtain-shaped, side-swept, wispy or curly, the aim is the same: dry the root first, guide the hair into position, then finish the ends without overworking them.
The short version
- Start when the fringe is damp, not soaking wet and not already half-set in the wrong direction.
- Use the concentrator nozzle so the airflow is narrow and controlled.
- Dry the roots left to right, then right to left, before shaping the fringe into its final position.
- Use a small round brush for bend, a paddle or styling brush for a flatter finish, and your fingers for curly or textured fringes.
- Keep heat moderate and finish with cool air once the shape is in place.
- If your fringe splits, focus on the cowlick or parting at the root rather than trying to smooth only the ends.
Start with the fringe, not the rest of your hair
The fringe should be the first section you dry after washing, because shorter hair sets quickly. If you rough-dry the rest of your hair first, the fringe may already have dried into a kink, split or unwanted parting by the time you get to it.
Blot the fringe with a towel until it is damp rather than dripping. If it has already dried, mist it with water at the roots and mid-lengths. A fringe that is only damp at the ends is harder to redirect, because the root has already decided where it wants to sit.
Use a light hand with styling products. A tiny amount of smoothing cream, heat protectant or volumising spray can help, but too much product makes a fringe separate into pieces or turn greasy faster. Fine fringes usually need less than you think; thick or coarse fringes can handle a little more, mainly through the mid-lengths rather than the scalp.
Set up your dryer properly
A hair dryer is much easier to control with the nozzle attached. Without it, the airflow spreads too widely, which can rough up the cuticle and make a fringe puff out. Aim the nozzle down the hair shaft where possible, and keep the dryer moving so one small section is not overheated.
You do not need the hottest setting for a fringe. Medium heat is usually enough because the section is small. Use higher airflow to move the root, then reduce the speed when refining the shape. If your dryer has a cool-shot button, use it at the end to help set the bend.
For brush choice, think about the finish you want rather than grabbing the nearest tool. A small ceramic or bristle round brush gives curve and lift. A flat styling brush gives a smoother, straighter fringe. A vented brush speeds up drying but can create too much movement on very short or wispy fringes. A classic styling brush such as the Denman D3 Original Styler can work well for controlled directional drying, but the right size and grip matter more than the brand.
Step-by-step: the basic fringe blow-dry
1. Comb the fringe forward
Bring the entire fringe section forward from the root. Even if you wear it parted or swept to one side, drying it forward first gives you a cleaner base and helps prevent gaps. Check that longer side pieces are included if you have a curtain fringe or face-framing layers.
2. Dry across the forehead in both directions
Use your brush or fingers to move the fringe from left to right while directing the dryer at the roots. Then reverse the movement from right to left. This cross-drying step is the most useful part if your fringe splits in the middle or follows a cowlick.
Do not try to force the final shape immediately. The early stage is about neutralising the root direction. Once the fringe is around 70–80% dry, you can start styling it into its finished position.
3. Add shape at the ends
For a soft curve, place a small round brush under the fringe and roll it very slightly towards your face while drying. Avoid wrapping the hair tightly around the brush unless you want a bouncy, rounded fringe. For a more modern finish, use just enough bend to stop the ends sticking out.
For a flatter, straighter result, hold a paddle or styling brush against the fringe and direct the airflow downwards. Keep the brush moving so you do not create a hard line or helmet-like shape.
4. Cool the shape before touching it
Once the fringe is dry and sitting where you want it, blast it briefly with cool air. Let it settle for a few seconds before adding spray or moving the pieces around. Touching it while it is still warm can undo the shape you have just created.
Adjust the method for your fringe type
Blunt fringe
A blunt fringe needs clean root control and a smooth surface. Dry it straight down first, then move it side to side to remove any parting. Use a flat brush if you want a sleeker look, or a small round brush if the ends need a slight bevel.
Avoid over-rounding. The most common mistake with a blunt fringe is rolling the brush too far under, which can make the fringe look shorter and puffier than intended. Keep the brush movement shallow and focus the airflow from root to tip.
Curtain fringe
A curtain fringe needs lift at the centre and movement away from the face. Start by drying the roots forward and side to side, then create the parting only once the hair is mostly dry. Place a round brush under one side, lift slightly at the root, then roll the ends away from your face. Repeat on the other side.
If the centre collapses, dry the root forward first, then push the sections outwards. If the wings flick too dramatically, use less brush rotation and more downward airflow. A curtain fringe should frame the face, not spring away from it.
Side-swept fringe
For a side-swept fringe, begin by drying the hair in the opposite direction from where you want it to sit. This creates lift and stops it lying flat against the forehead. When it is nearly dry, sweep it back into place and smooth the ends.
If your side fringe separates into strings, you may be using too much product or directing too much heat at the ends. Reset the root with a little water, dry across the forehead, then use a tiny amount of lightweight finishing cream only where needed.
Wispy fringe
A wispy fringe needs less brush tension. Use your fingers or a small flat brush, keep the dryer on a gentler airflow, and avoid heavy oils near the root. The goal is soft separation, not a perfectly solid sheet of hair.
If it goes fluffy, smooth the top layer with downward airflow. If it goes limp, lift the roots gently with your fingers while drying and avoid applying conditioner too close to the fringe area when washing.
Curly or wavy fringe
A curly fringe usually looks better when the curl pattern is encouraged rather than stretched completely straight. Apply your curl product lightly, position the fringe where you want it to dry, then use low airflow. A diffuser can help preserve curl shape, while your fingers can lift the root without breaking the pattern.
If your fringe sits flat at the roots but curls at the ends, try clipping the root while drying or diffusing. The same principle used for volume through the crown can work around the front hairline; for more detail, see this guide to root clipping curly hair while diffusing.
Match the technique to your hair type
- Fine hair: Use less product, lower brush tension and a quick cool shot. Too much serum or heavy cream can make the fringe separate by lunchtime.
- Thick hair: Section the fringe horizontally if it feels bulky. Dry the underneath first, then smooth the top layer so the whole section sits together.
- Coarse hair: Use steady tension and controlled airflow. A smoothing cream can help, but keep it away from the scalp to avoid a greasy finish.
- Oily roots: Avoid rich products on the fringe and keep skincare away from the hairline where possible. Dry shampoo can help refresh the root on day two, but it should not replace proper drying after washing.
- Coloured or heat-sensitive hair: Use moderate heat and do not keep the dryer fixed in one place. A dryer with reliable heat control, such as the Dyson Supersonic hair dryer, is one recognisable example to compare against, but always check the settings and attachments that suit your routine.
How to stop a fringe splitting
A fringe usually splits because of root direction, not because the ends are misbehaving. Cowlicks, natural partings, sleep creases and uneven drying can all create gaps. The fix is to re-wet the root, then dry against the split before styling the fringe into place.
Try this quick reset:
- Mist the roots of the fringe with water.
- Comb the fringe forward so the split is closed.
- Dry left to right for a few seconds, then right to left.
- Press the root flat with your brush while directing airflow downwards.
- Shape the fringe only when the root is nearly dry.
If your fringe splits again after a few hours, check whether your moisturiser, SPF or foundation is transferring onto the hair. Fringes sit close to the skin, so they pick up product and oil more quickly than the lengths.
How to avoid a puffy or over-rounded fringe
A puffy fringe is usually caused by too much heat, too much brush rotation or airflow pushing up underneath the hair. Use the nozzle, point the dryer downwards and reduce the amount of hair wrapped around the brush.
If you like a soft curve but not a full rounded shape, hold the brush under the fringe for only the final few seconds of drying. Then pull the brush down and slightly forward rather than rolling it all the way under. This gives polish without the bubble effect.
For very thick fringes, split the section in two. Dry the lower layer smooth first, then drop the top layer over it. This gives a neater finish and avoids the top layer puffing away from the forehead.
What to do in damp or humid weather
British drizzle and humid commutes can undo a fringe faster than the rest of your hair. The key is to dry the fringe fully at the root, use a light anti-frizz product only where needed, and avoid leaving the hair slightly damp before leaving the house.
If your fringe expands as soon as you step outside, use a small amount of flexible hairspray on a brush rather than spraying heavily onto the hair. Brush it through the surface layer so the fringe still moves. For stubborn face-framing frizz, this piece on whether mini straighteners can control frizz in humid weather is a useful next read, especially if you are weighing up a quick heat touch-up against better blow-dry technique.
Keeping the shape overnight
A freshly styled fringe can be flattened or bent while you sleep. If you want to preserve a smoother finish, brush the fringe into position before bed and keep heavy night creams away from the hairline. Some people prefer to pin longer fringe pieces loosely to either side, while shorter blunt fringes usually need a quick morning mist and reset.
If your whole blow-dry tends to crease overnight, a wrapping method can help keep the front smoother. The technique is slightly different from fringe-only styling, but the principles overlap; this tutorial on wrapping hair overnight for a smooth blow-dry finish explains how to protect the shape while you sleep.
Common mistakes that make a fringe harder to style
- Waiting too long after washing: The root starts setting as it dries, so deal with the fringe first.
- Using no nozzle: Wide airflow creates frizz and makes short layers harder to control.
- Overloading product: A fringe shows grease and residue quickly because it sits on the forehead.
- Only smoothing the ends: Most fringe problems begin at the root, so start there.
- Using a brush that is too large: Oversized round brushes can create too much bend and make the fringe spring up.
- Finishing while hair is still warm: Let the shape cool before touching, spraying or separating pieces.
Things readers ask
Should I blow-dry my fringe wet or damp?
Damp is best. If it is soaking wet, it takes longer and can become frizzy while you work. If it is nearly dry, the root may already be set in the wrong direction.
Can I style a fringe with a hair dryer every day?
Yes, if you use moderate heat, keep the dryer moving and avoid repeatedly overheating the same small section. On non-wash days, mist the roots lightly rather than fully re-washing the fringe.
Why does my fringe look good at home but separate later?
It may be picking up oil, skincare or humidity. Dry the root fully, use less product near the scalp and keep face products away from the hairline where possible.
Is a round brush always necessary?
No. A round brush is useful for bend and lift, but a flat styling brush or your fingers may be better for blunt, wispy, curly or low-volume fringes.
How do I refresh a fringe without washing all my hair?
Mist the fringe roots with water, comb forward, dry side to side, then reshape. If the roots are oily, use a small amount of dry shampoo before restyling.
Key takeaways
The most reliable way to style a fringe with a hair dryer is to control the root before worrying about the ends. Dry the fringe first, use a nozzle, move the hair in both directions, then shape it according to your fringe type and hair texture.
Blunt fringes need smooth downward airflow, curtain fringes need controlled lift and outward movement, side fringes benefit from being dried against their final direction first, and curly fringes usually need gentler airflow with the curl pattern preserved. Once you understand what your root is doing, the rest of the styling becomes much easier.