Fine hair can take a flexi-rod curl beautifully, but it also tangles faster because each strand has less weight and grip. The trick with flexi rods fine hair is not to wind tighter, but to control section size, product slip and removal. Done well, you get soft bend, lift and definition without the knotty ends or fuzzy halo.
Start with hair that is smooth, lightly conditioned and almost dry, then wrap each section flat and remove the rods in the opposite direction of the curl. If your ends are fragile, bleached or prone to fairy knots, spend more time on detangling and end placement than on making the set look perfectly symmetrical.
In brief
- Use small-to-medium sections rather than very thin slivers, which can twist into stringy knots.
- Hair should be dry or around 80–90% dry before wrapping, unless your texture needs more dampness to set.
- Apply a lightweight leave-in, mousse or setting spray sparingly; sticky product makes fine hair snag.
- Keep the section flat as you wrap. Rope-twisting the hair around the rod is the main cause of tangling.
- Unbend the rod first, then unwind slowly from the ends. Do not pull the rod out sideways.
Why fine hair tangles on flexi rods
Flexi rods work by bending a soft foam-covered rod around a wound section of hair. That bend is useful because it holds the curl without clips, but it can trap fine strands if the hair is twisted too tightly, wrapped unevenly or removed before it is fully set.
Fine hair also has less internal weight than medium or coarse hair. That means it can lift and float away from the rod while you are wrapping, especially around the ends and hairline. If you add too much mousse, gel or curl cream, those floating strands can dry into the set and catch when you unwind.
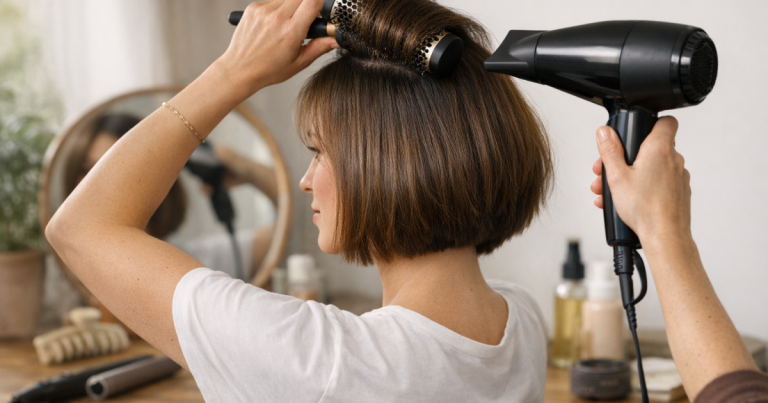
Compared with foam rollers, flexi rods give more control over curl direction and root placement, but they are less forgiving if you rush. If your priority is a softer, looser overnight result with fewer winding steps, it is worth reading how heatless curling ribbons and foam rollers differ before choosing your method for the night.
Step 1: prep the hair so it has slip, not stickiness
The best base is clean or day-two hair that has been brushed through from ends to roots. If your hair is freshly washed and very silky, add a light styling product for hold. If it is dry, bleached or rough at the ends, add a tiny amount of leave-in conditioner or a light oil through the last few centimetres only.
Avoid heavy curl creams on fine hair unless your texture genuinely needs them. Too much product can make the curl look limp at the root and tacky at the ends. A palmful of lightweight mousse distributed through the mid-lengths is usually easier to control than a dense cream, but the right amount depends on hair density, porosity and how well your hair normally holds a set.
Step 2: choose the rod size by the curl you want
For fine hair, rod size affects both curl shape and tangling risk. Very narrow rods create tighter coils, but they also require more rotations, which means more chances for ends to overlap. Medium rods are often the easiest starting point because they create a defined bend without compressing the hair too tightly.
- Short fine hair: use smaller rods only where you need shape, such as around the crown or sides. Keep sections neat and avoid wrapping tiny wisps.
- Fine bob or lob: medium rods usually give a soft, bouncy curl. Place rods vertically for movement or horizontally for more classic volume.
- Long fine hair: use medium-to-larger rods and avoid overloading each rod. Long lengths can knot if too much hair is wound onto one bend.
- Fine but dense hair: work in more sections, not tighter sections. Density needs distribution; strand thickness still needs gentleness.
Step 3: section for control, not perfection
Part the hair into manageable zones: crown, sides, back and underneath. Clip away the sections you are not working on so loose strands do not get caught around the rod. For most fine hair, each working section should be roughly the width of the rod or slightly narrower.
Comb each section smooth, then hold it with light tension. If the hair fans out, lightly mist the mid-lengths or smooth it between your fingers before wrapping. The aim is a flat ribbon of hair, not a twisted rope. Fine hair looks fuller when the curl surface is smooth, so this step matters more than cramming in extra rods.
Step 4: wrap without trapping the ends
Place the rod near the ends and tuck the very tips smoothly around it. This is the moment that decides whether the curl looks polished or frayed. If your ends keep escaping, use a small end paper or fold a tissue-like setting paper around the tips before wrapping. Do not use a tight elastic at the end; it can leave dents and catch fine strands.
Roll the section upward or spiral it along the rod, depending on the finish you want. For a traditional curl, keep the hair flat and roll from ends to roots. For a looser wave, wrap the section diagonally along the rod with space between each turn. In both cases, keep the pressure even and stop before the rod feels crowded.
When the rod reaches the root, bend both ends gently to secure it. Avoid folding the rod so tightly that it pinches the hair. A soft U-shape is usually enough for fine hair, particularly if you are setting overnight and do not want pressure marks near the scalp.
Step 5: let the set dry completely
Fine hair often feels dry before the inner layers of the curl are fully set. If you remove the rods too soon, the curl can collapse and tangle because the damp hair has not taken a stable shape. Wait until the sections feel dry and cool throughout, not just on the surface.
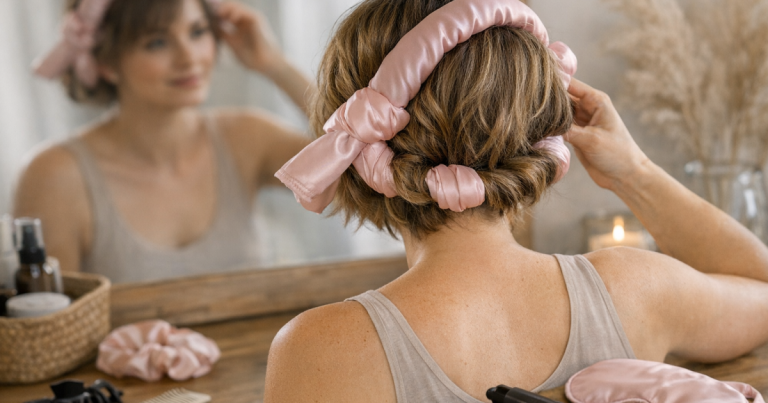
For overnight setting, protect the rods with a silk or satin scarf, bonnet or wrap. Tie it loosely enough that the rods are not crushed into the scalp. If you prefer to secure loose pieces away from your face, choose gentle, snag-resistant accessories; our review of crease-resistant hair ties for heatless styling explains why some shapes are kinder to set hair than standard elastics.
Step 6: remove the rods slowly and separate last
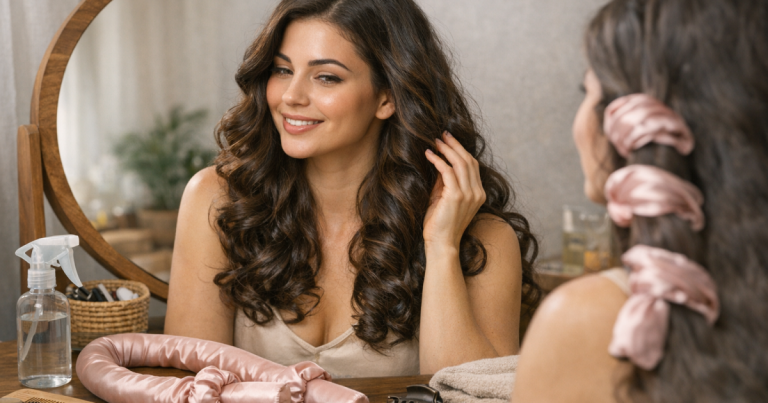
Removal is where most tangles happen. Start with the underneath sections so you can see and feel what you are doing. Unbend the rod first, then support the curl with one hand while unwinding the rod in the reverse direction. If you wrapped clockwise, unwind anticlockwise. Never drag the rod straight down through the curl.
Once every rod is out, wait a minute before separating. Fine hair expands quickly, and separating too early can turn definition into fluff. Coat your fingertips with the smallest trace of serum or light oil, then split each curl only where it naturally wants to open. For extra root lift, slide fingers under the roots and gently shake rather than brushing through the lengths.
Common mistakes that cause knots
- Wrapping hair that is too wet: saturated fine hair stretches and clings to itself, especially at the ends.
- Using sticky gel: strong-hold gels can dry hard around the rod and make removal rough.
- Taking sections that are too tiny: very small sections twist into tight cords and are harder to unwind cleanly.
- Overbending the rod: a tight fold can clamp fine hair and leave a kink at the root.
- Brushing the set immediately: use fingers first. Brush only if you deliberately want a soft, fluffy vintage finish.
How to adapt the method to your hair type
Fine, straight hair
Use a light mousse or setting spray and make sure the hair is almost dry before wrapping. Straight fine hair can slip off the rod, so focus on neat end placement and medium tension. Smaller rods may give better longevity, but start with medium rods if tangling is your main issue.
Fine, wavy hair
Work with your natural pattern instead of forcing every section in the same direction. Use slightly damp hair if your waves need encouragement, but keep product light. Alternate curl direction around the face only if you want a more tousled finish.
Fine, fragile or bleached hair
Use fewer, larger sections and avoid sleeping on a very tight set. Fragile ends catch more easily, so detangle thoroughly and protect the last few centimetres with a light conditioning product. If your hair feels rough after repeated heat styling or colour, the advice in our piece on bond-building treatments after bleach or heat styling may help you decide whether your routine needs repair support as well as gentler styling.
Questions people ask
Should fine hair be wet or dry for flexi rods?
Usually, slightly damp or almost dry is best. Very wet fine hair takes longer to dry and is more likely to stretch, flatten and tangle around the rod.
How do I stop the ends looking frizzy?
Comb the section smooth, add a tiny amount of leave-in to the ends, and tuck the tips flat before rolling. End papers can help if your ends are layered or dry.
Can I sleep in flexi rods with fine hair?
Yes, but keep the rods loosely bent and protect them with satin or silk. If your scalp is sensitive, use fewer rods and place them slightly away from pressure points.
Why do my curls fall out quickly?
The hair may be too clean, too soft or not fully dry when removed. Try a lighter conditioner on wash day, a small amount of mousse, and a longer setting time.
Should I brush out flexi-rod curls?
Finger-separate first. A brush can turn fine curls airy and pretty, but it can also remove definition fast, so brush only after the set has cooled and settled.
In brief
Flexi rods can work brilliantly on fine hair when the set is smooth, light and patient. Keep the hair detangled, wrap flat rather than twisted, choose rods that do not require excessive rotations, and remove each rod by unwinding instead of pulling. The gentler your prep and release, the more polished the curl will look and the less likely you are to finish with knots at the ends.