The easiest way to diffuse wavy hair without frizz or crunch is to start wetter than you think, use less product than curly routines often suggest, and keep the diffuser still until the wave has set. Wavy hair usually needs encouragement rather than force: too much touching, too much heat or too heavy a styler can turn loose bends into puff, stringiness or a rigid cast.
Think of diffusing as a setting method, not just a drying shortcut. Your aim is to support the wave shape while removing water gradually, then soften the finish only once the hair is fully dry.
What to know first
Wavy hair sits in the awkward middle ground between straight and curly: it can collapse if under-styled, but it can look crispy or overloaded if treated like a tighter curl pattern. The sweet spot is lightweight hold, controlled airflow and minimal disruption.
- Diffuse on very damp hair: Waves set better when they are still clumped together, not half-separated and fluffy.
- Use lower airflow first: High blast settings can roughen the cuticle and break wave clumps apart.
- Choose flexible hold: A light mousse, foam, lotion or small amount of gel usually works better than a heavy cream.
- Stop touching early: Scrunching constantly while drying is one of the fastest ways to create frizz.
- Soften at the end: Any slight cast should be scrunched out only when the hair is completely dry.
Why wavy hair goes frizzy or crunchy when diffused
Frizz usually appears when the outer layer of the hair is disturbed before the wave has set. That can happen during towel-drying, product application, sectioning or diffusing. Crunch, on the other hand, usually comes from too much hold product, uneven product distribution or stopping before the hair is dry and then touching it repeatedly.
Waves are also more easily pulled out by gravity than curls. If you hover a dryer over the hair with strong airflow, the ends can scatter and the roots can flatten. If you push the diffuser bowl up too aggressively, the waves can bunch into bends that look uneven once released. The method needs to be gentler than curly diffusing, but more supportive than a standard rough dry.
If your pattern is closer to ringlets underneath and looser on top, it can help to compare your technique with diffusing curly hair without creating frizz, then scale the product amount and scrunching pressure back for a softer wavy finish.
Set up before you switch the dryer on
Start with water, not extra product
After washing, squeeze water out gently with your hands, then use a microfibre towel or a smooth cotton T-shirt to blot. Avoid rubbing, twisting or rough towel turbans if your top layers frizz easily. Wavy hair often looks best when product goes onto hair that is still wet enough to form obvious clumps.
If your hair has started to dry before styling, mist it with water rather than adding another layer of product straight away. Over-producting damp but dehydrated-looking waves is a common cause of stiffness.
Use one main styler, then assess
For fine waves, a lightweight foam or mousse can give lift without making the lengths feel coated. For medium-density waves, a small amount of gel or a flexible curl lotion can help the pattern last. For coarse or porous waves, a little leave-in conditioner under a light hold product may reduce halo frizz, but keep it away from the roots if your hair gets greasy quickly.
Apply product with praying hands or gentle glazing first, then scrunch upwards once or twice to encourage shape. The product should feel evenly spread, not concentrated in crunchy patches at the ends.
Check the diffuser attachment
A wide bowl with prongs is useful for supporting waves because it holds the hair in place while air circulates. A shallow or narrow attachment can still work, but you may need to dry in smaller sections. Make sure the diffuser fits securely on the dryer before use, as a loose attachment can slip off mid-dry and disrupt the whole section.
The step-by-step diffusing method
Step 1: Create the parting and root direction first
Decide where you want your parting before the hair starts to set. If you want more volume, flip your parting slightly away from where it naturally falls, or lift the roots gently with your fingertips. Do this once, then leave it alone. Constantly moving the parting while drying creates short frizzy pieces around the crown.
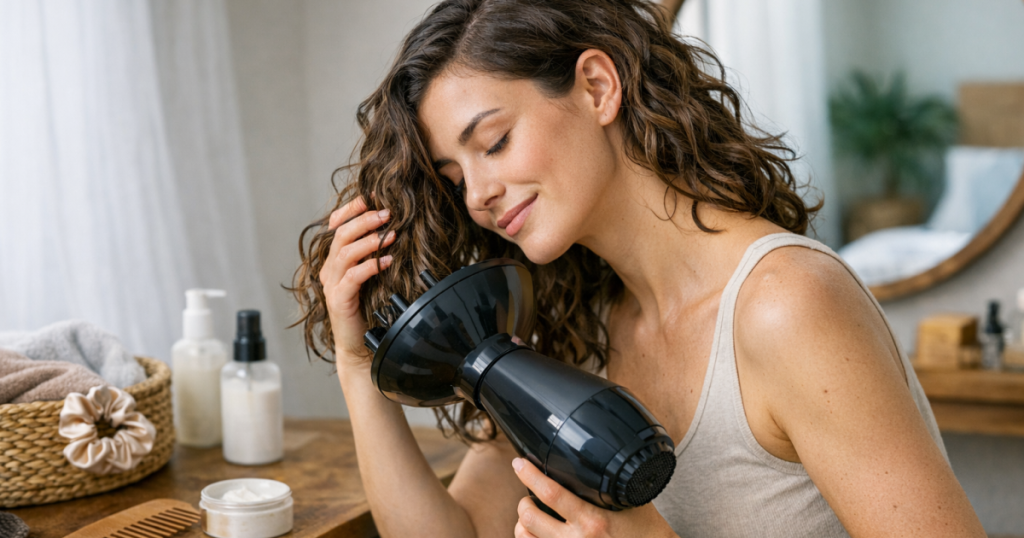
Step 2: Hover-dry the roots and canopy
Begin by holding the diffuser near the hair without scooping the lengths into the bowl. Use low or medium airflow and low to medium heat. Keep the dryer moving around the head, but keep the hair itself still. This helps remove surface moisture and reduces the shock of placing very wet hair directly into the diffuser cup.
Spend a few minutes on the root area, especially around the crown and nape. The aim is not to dry the hair fully yet; it is to give the roots enough structure that the lengths do not drag them flat.
Step 3: Cup the ends without bouncing
Once the hair is no longer dripping, place the ends of one section into the diffuser bowl and bring it gently towards the scalp. Hold it still for around 20–40 seconds, then switch the dryer off before lowering the section. This small pause reduces the blast of air that can scatter the ends as you move away.
Repeat around the head in sections. If your waves are loose, avoid pushing the diffuser too tightly against the scalp. A softer cup preserves longer S-shaped bends rather than forcing them into cramped kinks.
Step 4: Dry to at least 90% before touching
Many wavy routines fail in the last stretch. Hair can feel dry on the outside while the inner clumps are still damp. If you scrunch out the finish too soon, the hold breaks before the wave is set and the result is frizz with a slightly sticky feel.
Keep diffusing until the hair feels almost dry throughout. Let it cool for a few minutes before judging the finish. If you want to diffuse wavy hair with the least crunch, patience at this stage matters more than adding another product.
Step 5: Soften the cast carefully
If your hair feels slightly firm, that is not automatically a problem. A light cast can protect the wave while drying. To soften it, rub a drop of lightweight hair oil or serum between your palms, then gently scrunch the ends upwards. Do not rake through the hair unless you want a looser, brushed-out wave.
For fine hair, use clean dry hands first before adding oil. Even a small amount can flatten the roots or make the underneath look piecey. For thick or porous waves, a tiny amount through the ends can make the finish look more polished.
Adjust the technique for your wave type
Fine or low-density waves
Fine waves need lift and restraint. Use less conditioner near the roots, apply a lightweight foam in sections, and hover-dry the roots before cupping the lengths. Keep product away from the scalp if your hair collapses quickly. If you want extra lift without more heat, try setting the crown with rollers after drying; this guide to using Velcro rollers for root lift without heat is a useful next step.
Thick or dense waves
Dense waves need more sectioning. Clip the top half away with smooth sectioning clips, diffuse the underneath first, then release the crown. If you try to dry all of it at once, the outside can puff while the interior stays damp. Use a flexible gel or lotion rather than piling on mousse at the surface only.
High-porosity or colour-treated waves
Porous hair often absorbs water quickly but loses smoothness just as fast. Keep the airflow gentle, avoid stretching the hair while wet, and consider using a small amount of leave-in underneath your hold product. The goal is slip plus structure, not a heavy coating.
Loose, barely-there waves
For very loose waves, product placement and drying angle make a big difference. Scrunch from the ends, not the mid-lengths, and dry with your head tilted rather than fully upside down if that creates tangles. A full upside-down routine can give volume, but it can also rough up the canopy when you flip back.
Quick troubleshooting checks
- Frizz at the crown: You may be touching the roots too much or drying with airflow that is too strong. Hover-dry first and keep your fingers out of the top layers.
- Crunchy ends: Product is probably collecting at the bottom. Apply styler higher up first, then scrunch the leftovers into the ends.
- Flat roots with fluffy lengths: The roots need drying earlier. Lift them gently with the diffuser before cupping the ends.
- Stringy waves: You may need more water during styling or better product distribution. Wet clumps usually dry softer than separated damp strands.
- Waves dropping after an hour: Let the hair dry fully before leaving the house or tying it back. Damp waves stretch out quickly under coats, scarves and collars.
What to avoid if you want soft definition
Avoid rough-drying wavy hair with the nozzle first and then trying to rescue the shape with a diffuser afterwards. Once the clumps are broken, you are usually styling frizz rather than setting waves. Also avoid layering several stylers on a rushed wash day; mousse plus gel plus cream can work for some curl patterns, but it is often too much for soft waves.
Be careful with very hot settings. Heat can speed things up, but high heat combined with strong airflow tends to create a drier, puffier finish. A cooler final pass helps the hair settle and makes it easier to judge whether the cast is ready to soften.
At night, protect the shape rather than restyling from scratch every morning. A loose satin scrunchie, silk wrap or smooth pillowcase can help reduce friction. For more overnight detail, read how to sleep in heatless curls without frizz; the same low-friction principles work well for waves.
Questions people ask
Should wavy hair be soaking wet or damp before diffusing?
It should be very damp, but not dripping all over your shoulders. If the hair is too dry before product and diffusing, the wave clumps separate and frizz becomes harder to control.
Is mousse or gel better for wavy hair?
Mousse is often better for fine or flat waves because it gives lift. Gel is useful when waves need longer-lasting hold, but use a small amount and soften the cast only when fully dry.
Why does my hair look curlier wet but fluffy when dry?
The wave pattern is probably being disturbed before it sets. Use more water during styling, reduce towel friction, lower the diffuser airflow and stop scrunching once drying has started.
Can I diffuse waves every wash day?
Yes, if your hair tolerates it and you use sensible heat and airflow. Keep the dryer moving, use lower settings where possible, and balance heat styling with gentle detangling and conditioning.
How do I refresh diffused waves the next day?
Mist the frizzy areas lightly with water, smooth a tiny amount of product over the surface, then scrunch and let it air-dry. Avoid soaking the whole head unless you want to reset the style.
Why it matters
Good diffusing is less about chasing perfect curls and more about respecting what wavy hair naturally does. When you use enough water, moderate hold and calm airflow, waves can dry with movement instead of puffiness, and softness instead of a hard shell.
The best routine is the one you can repeat without overworking your hair. Start with the gentlest version, change one variable at a time, and let your finished waves tell you whether they need more hold, more root drying or simply less interference.